-
Detect hot-added cpu’s:
for a in /sys/devices/system/cpu/cpu*/online; do echo "1" > "$a"; done
Force disk rescan:
echo "- - -" > /sy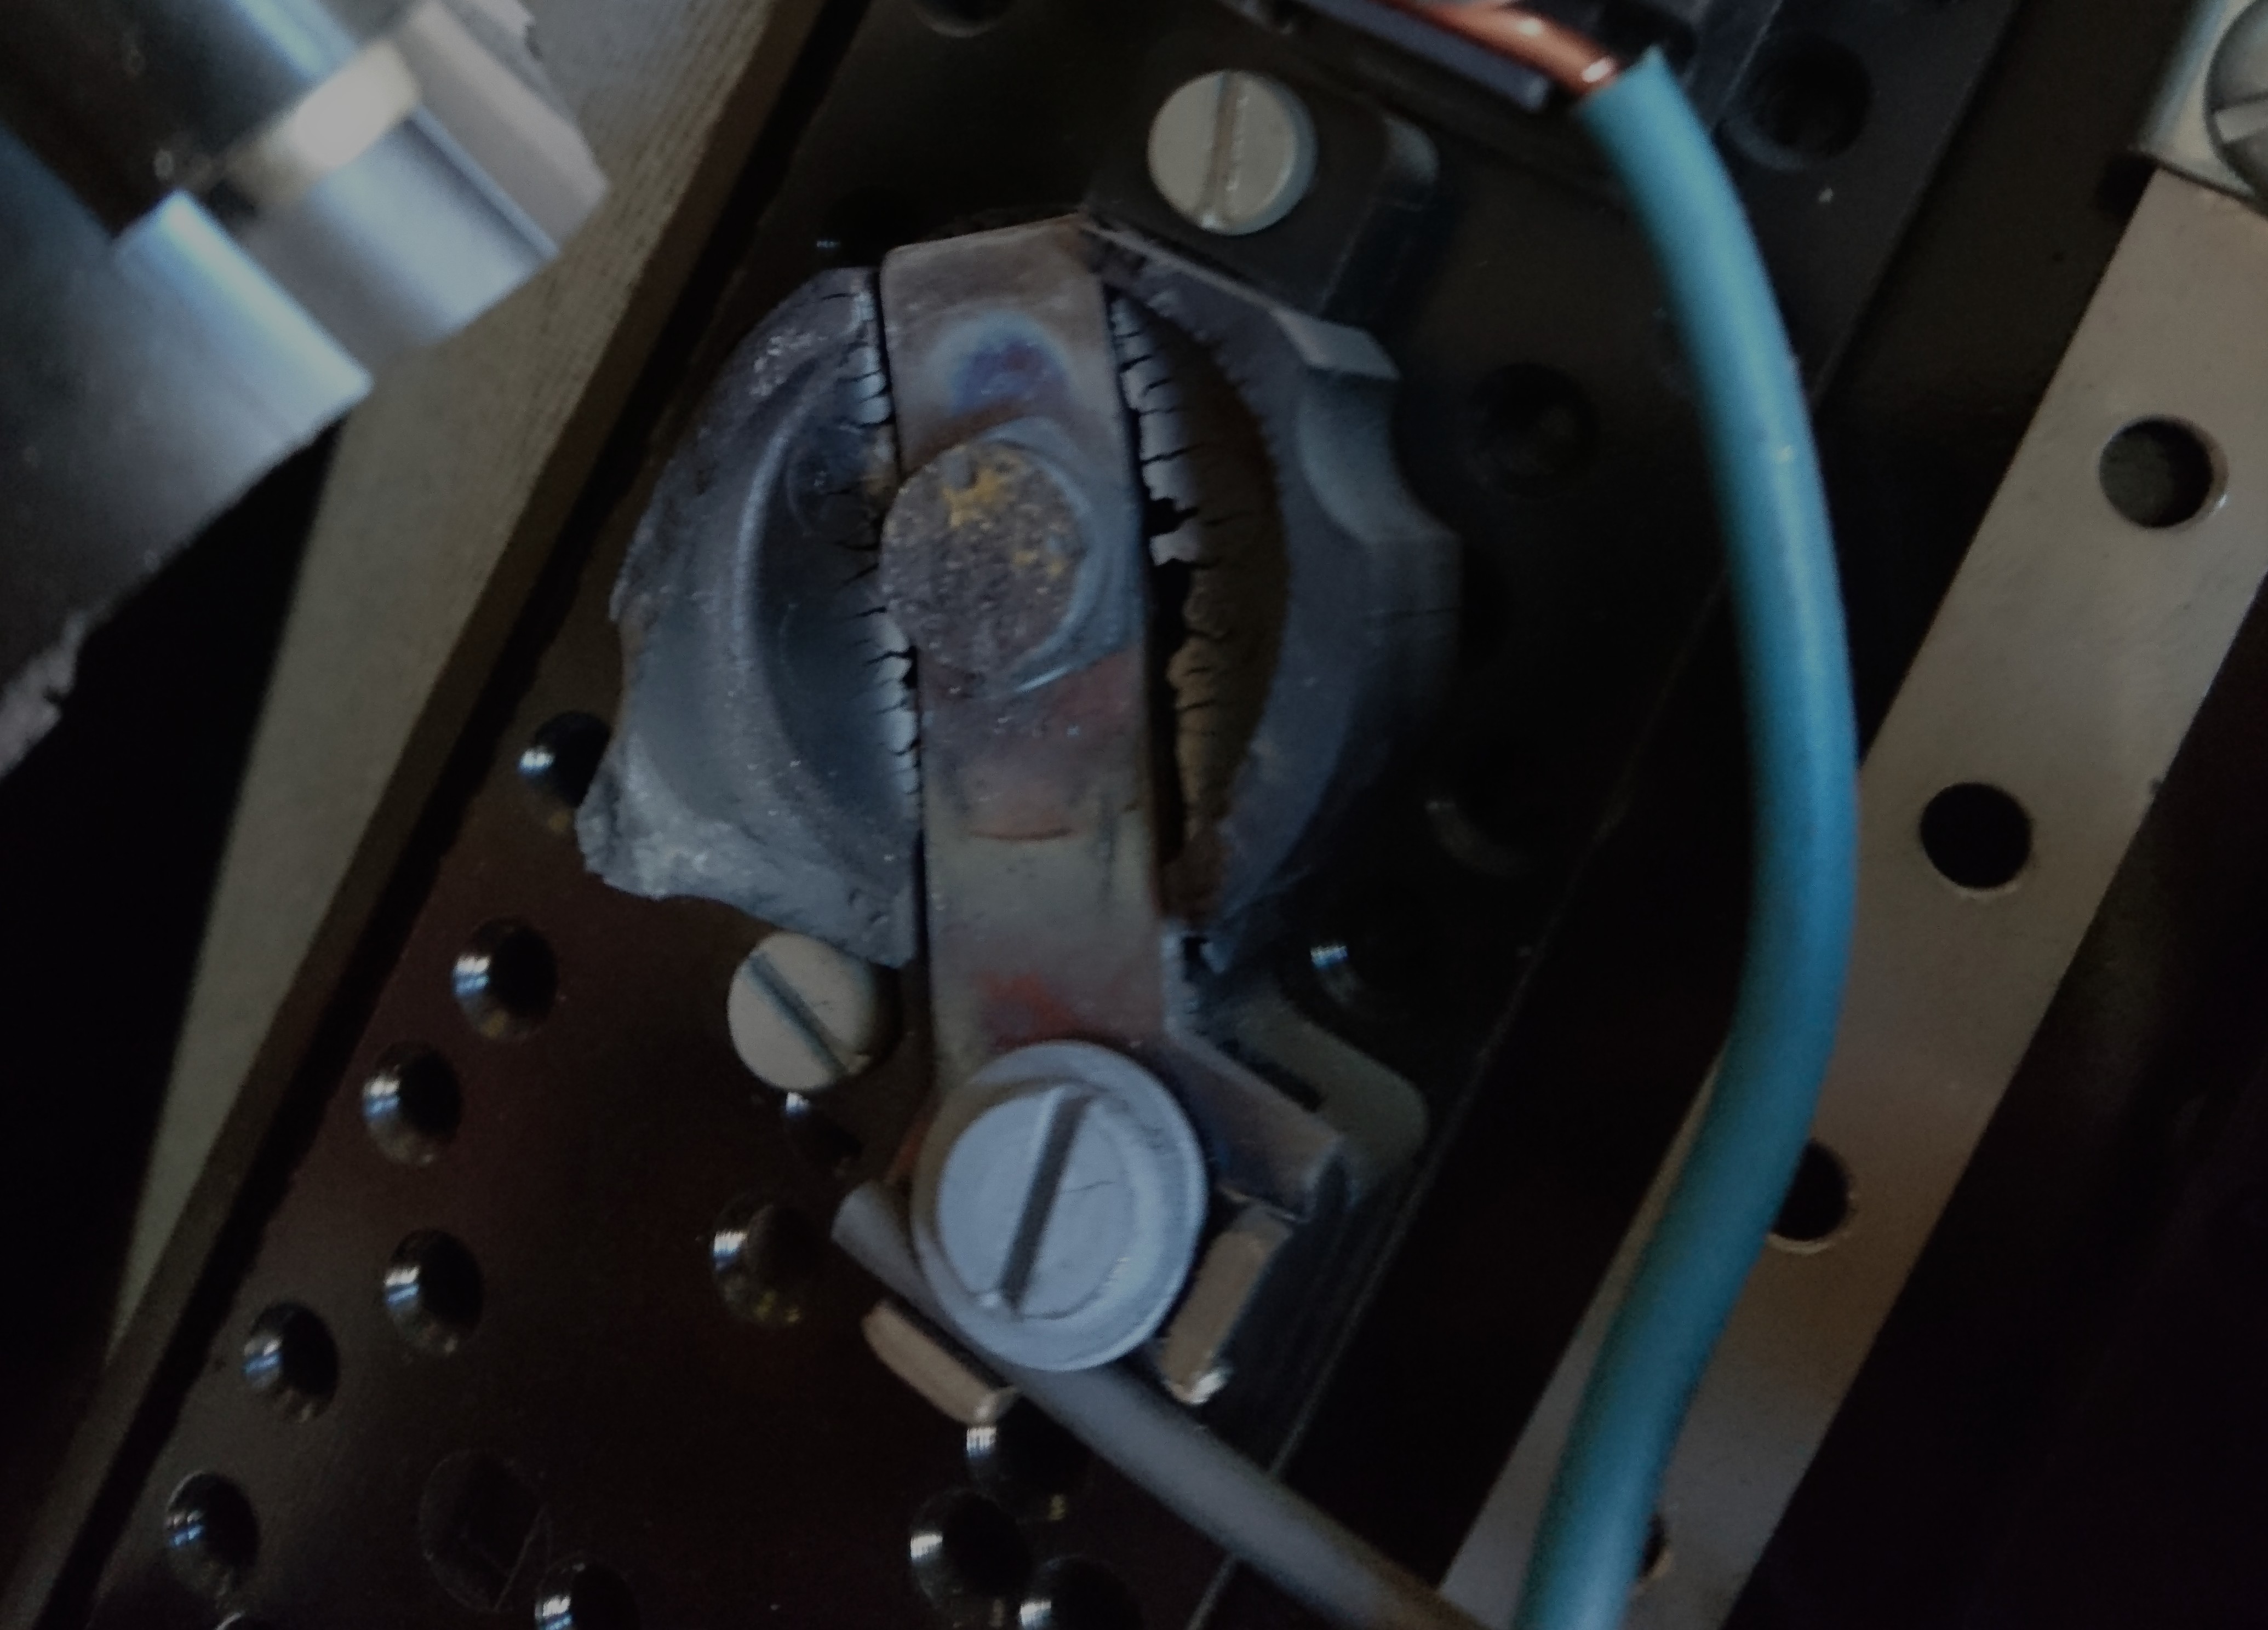 s/class/scsi_host/host0/scan
Detect hot-added cpu’s:
for a in /sys/devices/system/cpu/cpu*/online; do echo "1" > "$a"; done
Force disk rescan:
echo "- - -" > /sys/class/scsi_host/host0/scan
I have been sick as a dog the last 2 weeks back and forward, hit by 2 strains of flu that kept me in bed or begging to the porcelain god for most of the time, so not much has happen except the siren feature during the last days of being well, which is appended to part one of this series, if you missed it.
Beside that landing on the first page of HackerNews drove a lot interest, comments and feedback which i’ve only been partially able to respond to or look into to, will follow up. Just like the prior post, i will keep editing it as the build progresses and stuff i’ve done might become redundant, or included. In the meantime parts have kept arriving and i’ve felt well enough to take some pictures and blog a little so for now this post is mainly about the collection of parts.
So. Motor, rear diff, axles, disc-brakes, chains, sprockets have arrived:
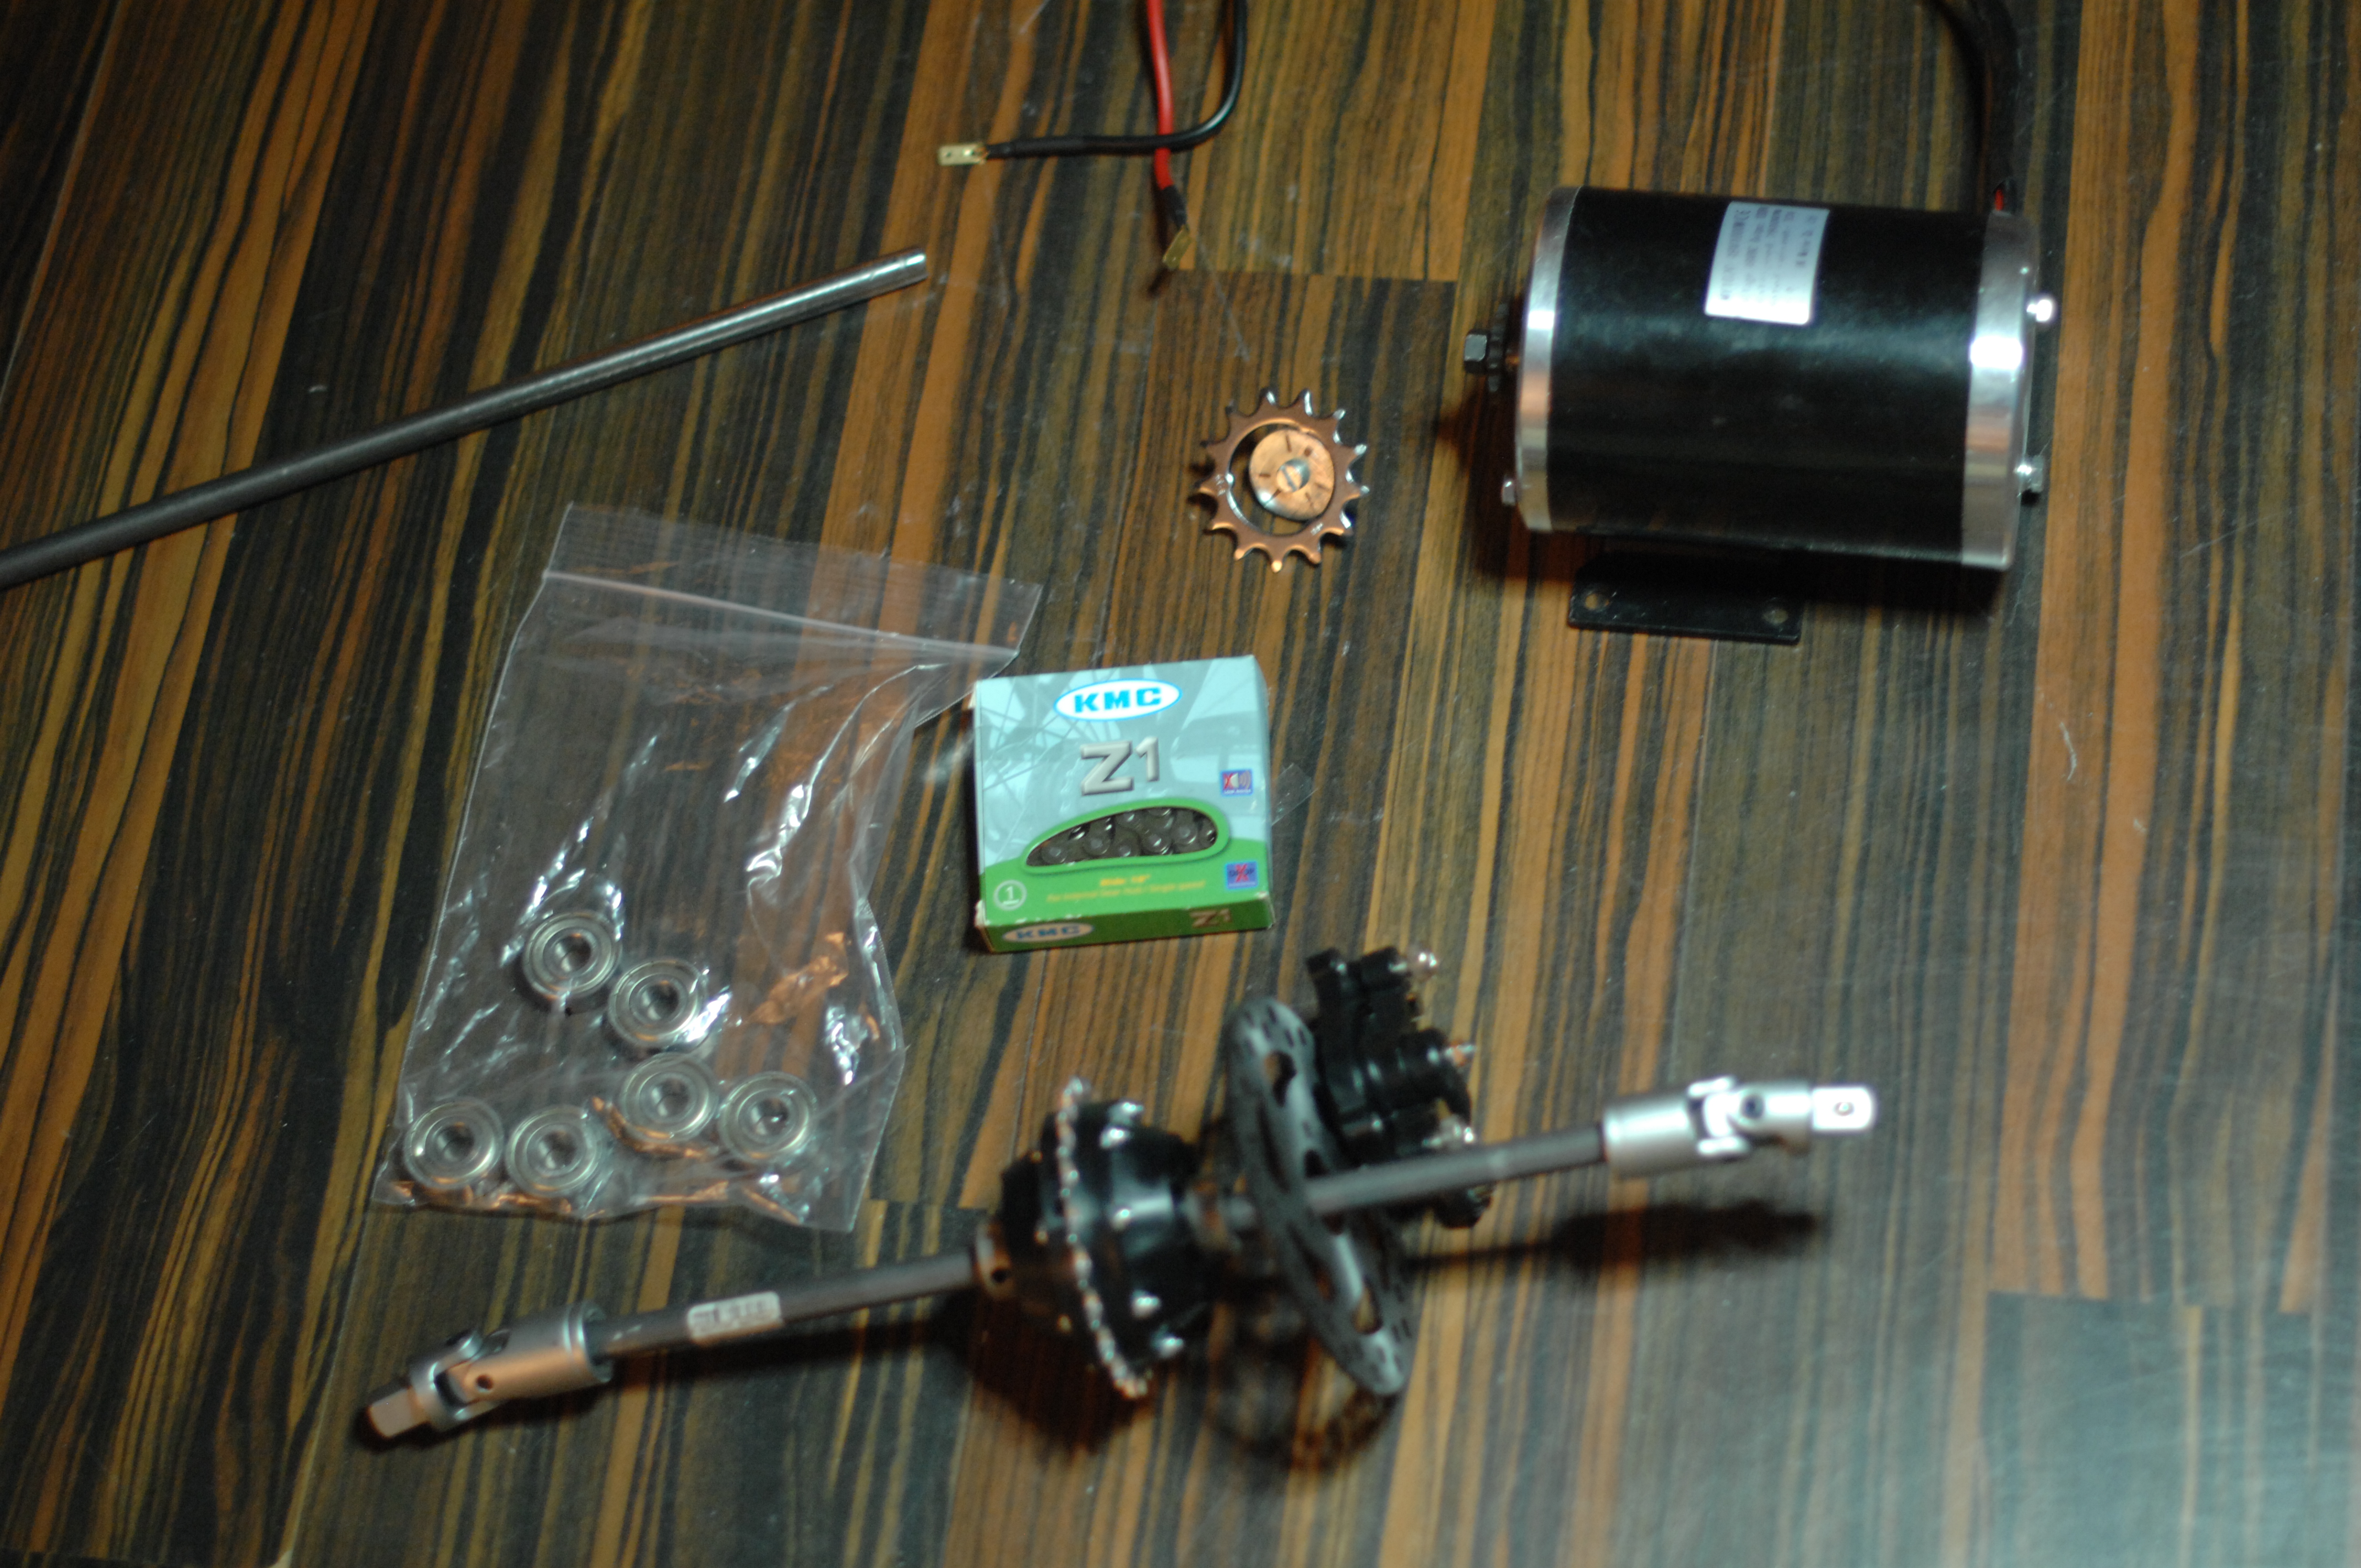
MY1020 48V1000W 2800RPM at a rated current of 32Amp. I giggled a little while placing this order. This engine is a beast, but with that said i am running it on 12 volt on a very fine-grained ESC and controller. Following days i will figure out a nice way to measure the rpm’s i am getting out of it and make sure i gear it correctly. My aim is strength, not speed.
General transmissions gt82005 Differential d16 This thing is beautiful, and the folks at General Transmissions are great. I had few questions, which was answered immediately, and shipment took 2 days from Germany.
Standard bicycle chain and sprocket, from the bike-store around the corner. As i am still not sure what kind of rpm i get out of the engine, i reserve to detail more before i know it will fit the bill.
I was looking for brakes for a while, looking mostly at disc-brakes for bicycles but these are not cheap and not the smallest either. Turns out pocket-bikes have mechanical brakes that could work for me. I ordered these brake-claws and these 120 mm discs. However to pull these brakes i also needed some heavy duty servos.
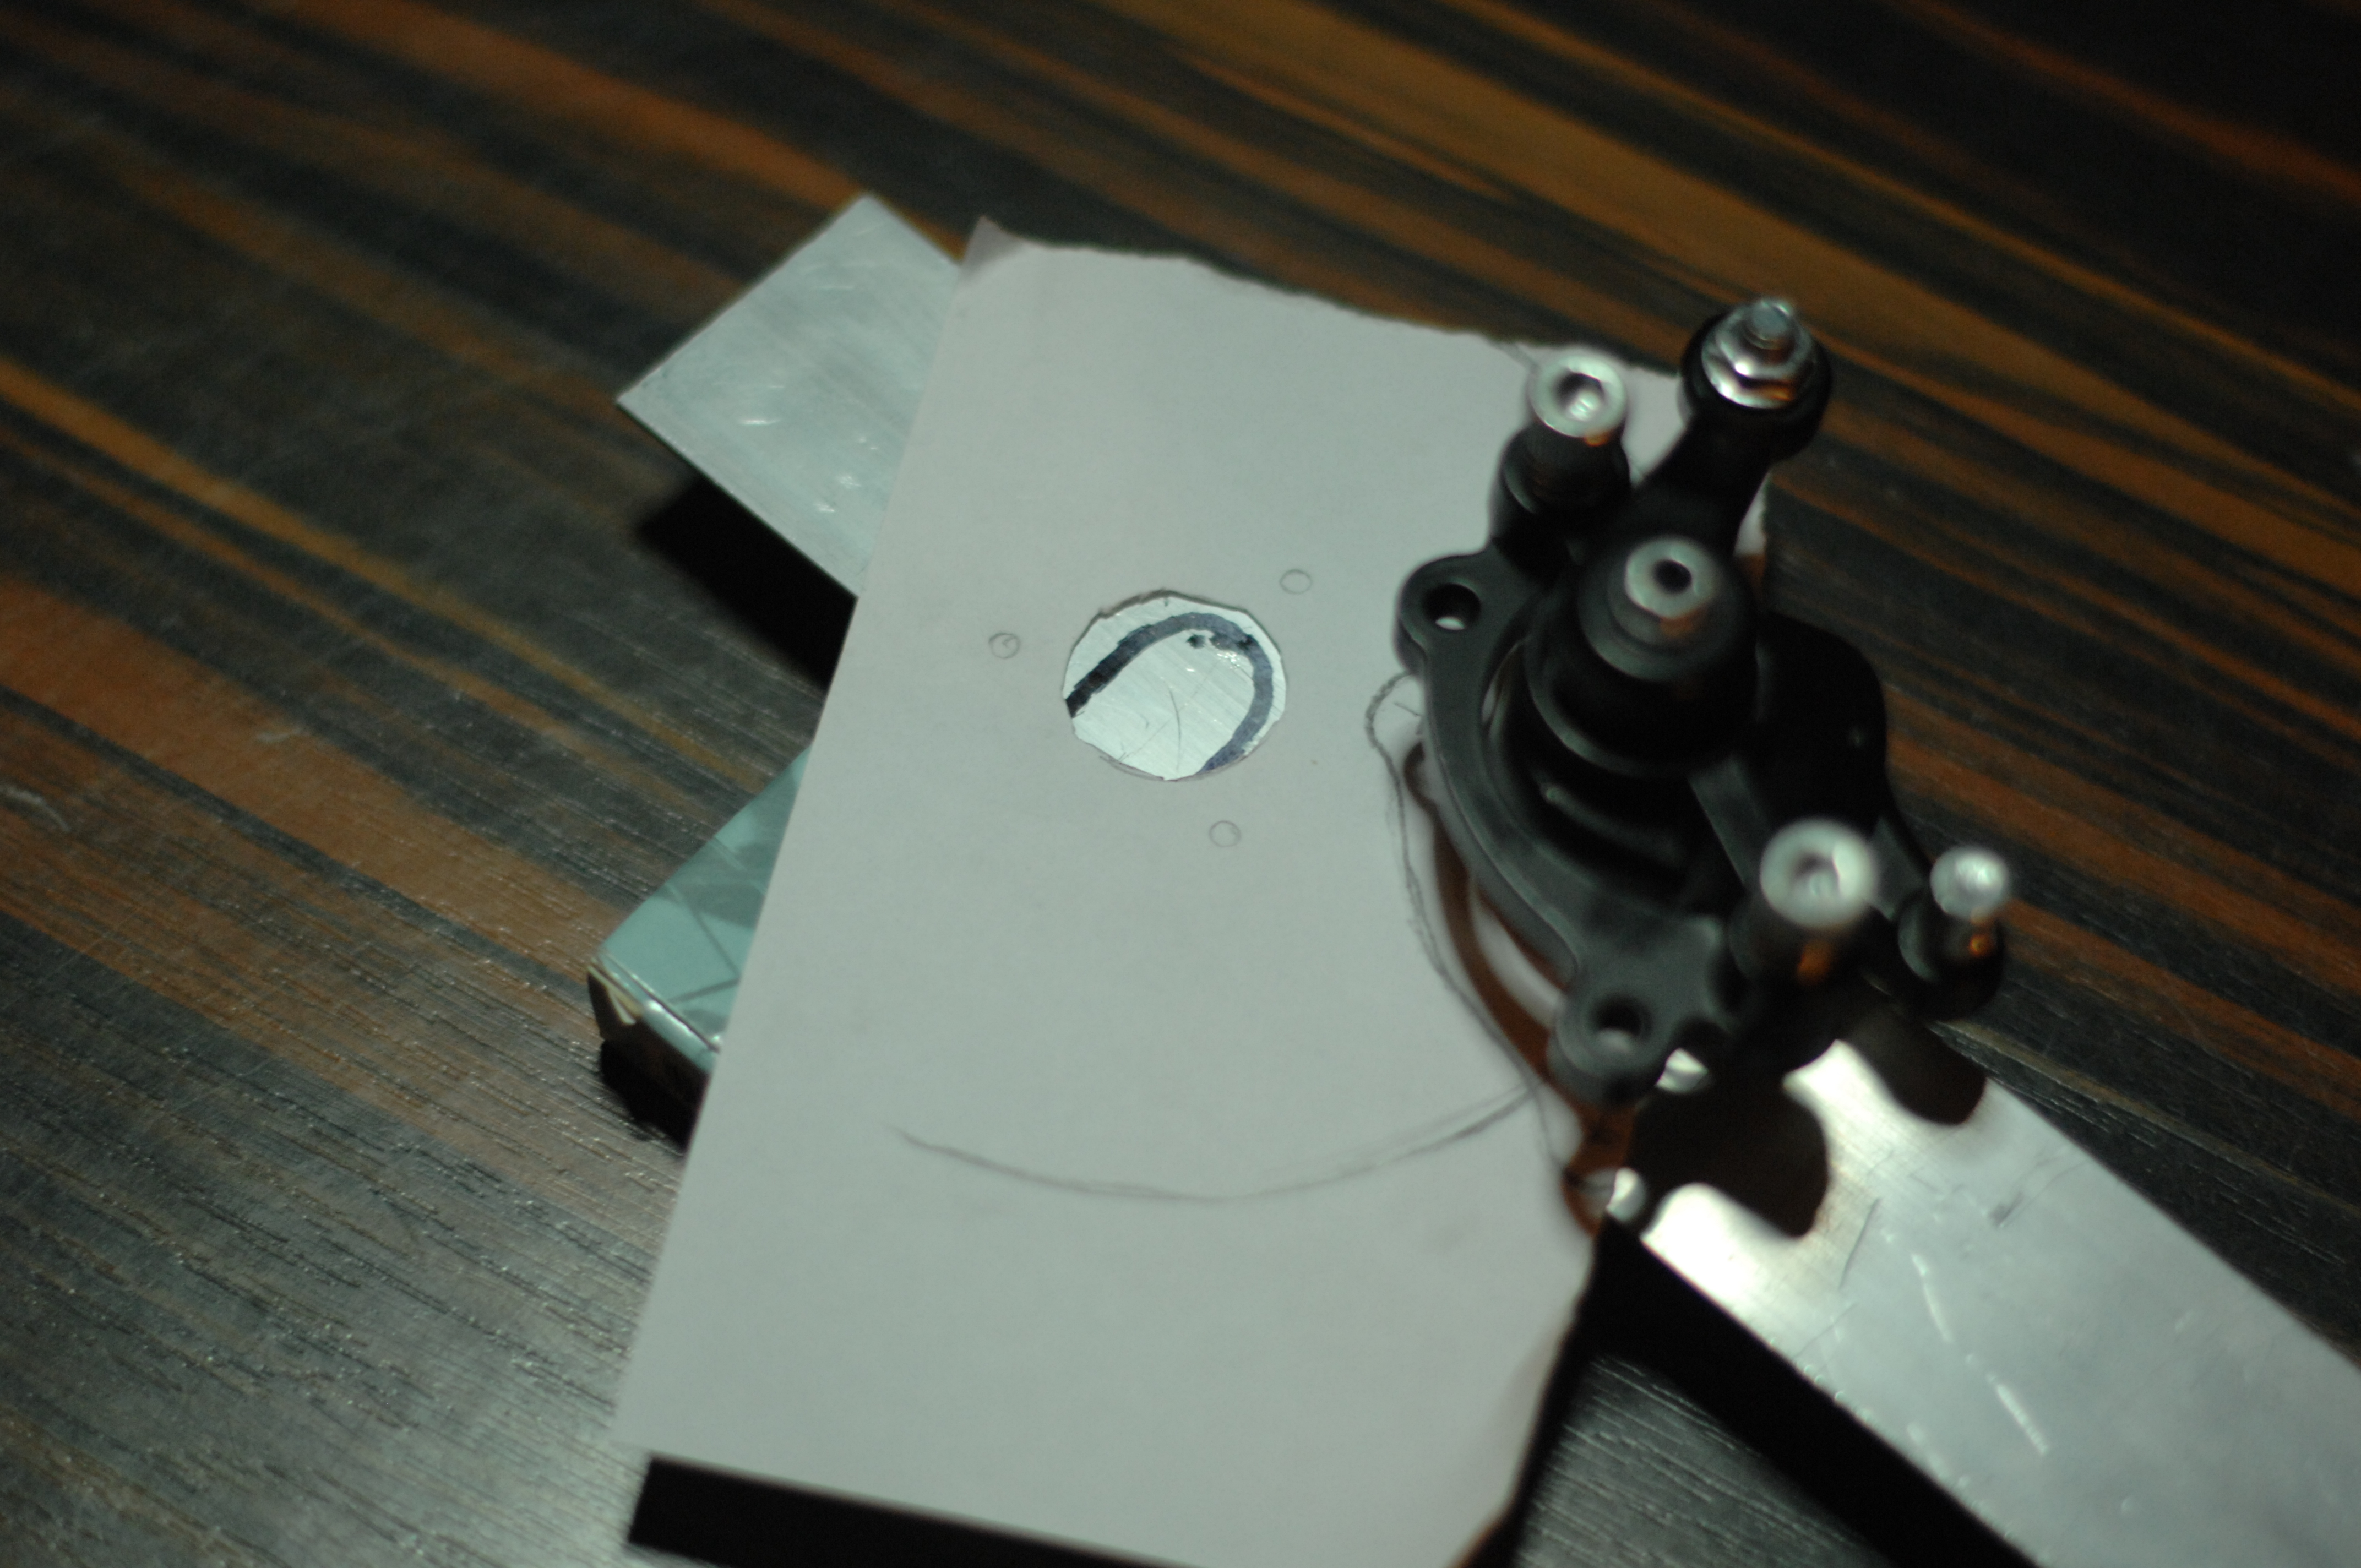
Not sure what other people do this process, but i tend place things on the floor, make a temporary placeholder or frame from anything i have around (cardboard, paper-molds, pvc plastics) for the parts i need, make measurements to make sure it will fit and at the point i am relatively sure the puzzle will go together with no issues, this is when i start raw cutting materials. Lastly the modifications is done to the car. This is just to make sure my son has his car during the weekends he spends with me, allowing me to keep progressing in the background. You will see this reflected in how i structure what gets done when.
Good question, i do realize the benefits of modern tools. I do model in Blend3r for 3d-printing, but am also trying to get into FreeCAD for these kind of jobs. It will come, i am not afraid of technology :)
Measurement for the front disc brake holder is being made.
As my welding rig is slowly getting ready, my power supply is up to standard and i’m mentally ready to take on a new challenge i started reading up on welding processes with aluminium. Most people advise against welding aluminium because it’s notoriously hard. It turns out the challenge is that aluminium melts around 660 degree’s Celsius, while the slag forming on the weld has a considerably higher melting temperature. To avoid oxidation it seems the key is using AC, where one polarity melts the metal and a switch of polarities causes the weld to clean itself.
From the little i’we seen and read so far, most people who advise from welding this material, come from welding steel and try to apply their steel-welding skills to this alloy, and that shit does not fly well.
It also seems that depending on the grade of aluminium (i.e depending if it’s a alloy mixed with elements such as magnesium, silicon, manganese, tin or copper) will make it more or less weldable. There are 8 main series (1xxx,2xxx, and so on called Wrought alloys) that all have very different properties in terms of strength, weldability, welder settings and filler materials added while welding. I would be lying if i said this will not take a while to get my head wrapped around.
Problem now is that all the material i bought have been purchased at general warehouses, so asking their staff what grade of aluminium they are selling and what alloys it’s composed of would be as useful as asking a toddler about bending time space continuum. I might actually be better of going to a proper metal supplier and be sure i know what i am buying. This is a bit of a setback, but that’s what you get for shopping first and asking questions later.
At the moment i understand i should avoid 2xxx and 7xxx (with a handful of exceptions) as these are considered unweldable (please correct me if i am wrong).
As for fillers, different grades have corresponding filler materials that will give the best results.
Having read this i understand that if you come from welding MIG, TIG or MMA on carbon steel or stainless, to slabbing two unknown pieces of aluminium together, the learning curb gets steep very fast. Lucky for me, i never welded more than a little MIG when i was a kid, so it’s all new. Not sure how or if that will benefit me, but we will see.
For now it seems my first welding will be a little stainless steel stick welding to get the sprocket on an axle. This seems like a reasonable challenge until i know what the hell i am doing :)
T.B.C
I bought my house in 2006, and beside for being an old drafty house that applies to standards set in the 50’ies i love the place.
However at an early stage i could see flickering in the light and hear arching electricity at some point. I did intend to address it and managed to narrow it down to the fuse-box but due to life changing rapidly in all directions i never got around to it.
At some point a fuse burned out, and as was replacing it i almost burned myself on the fuse-stand. I shut down the main-power, removed the fuse and only to notice the top of the porcelain fuse all burned out. With the power shut down, i used a screwdriver with some sandpaper on the top to clean up the metal to once more have contact. In the process i found another top of the fuse melted into the fuse-stand. I spent 20 minutes making it shine again, and since that it just worked. However, as i started rebuilding the car of my son i realized this would not be safe to run a welding machine consuming 5-8kw.
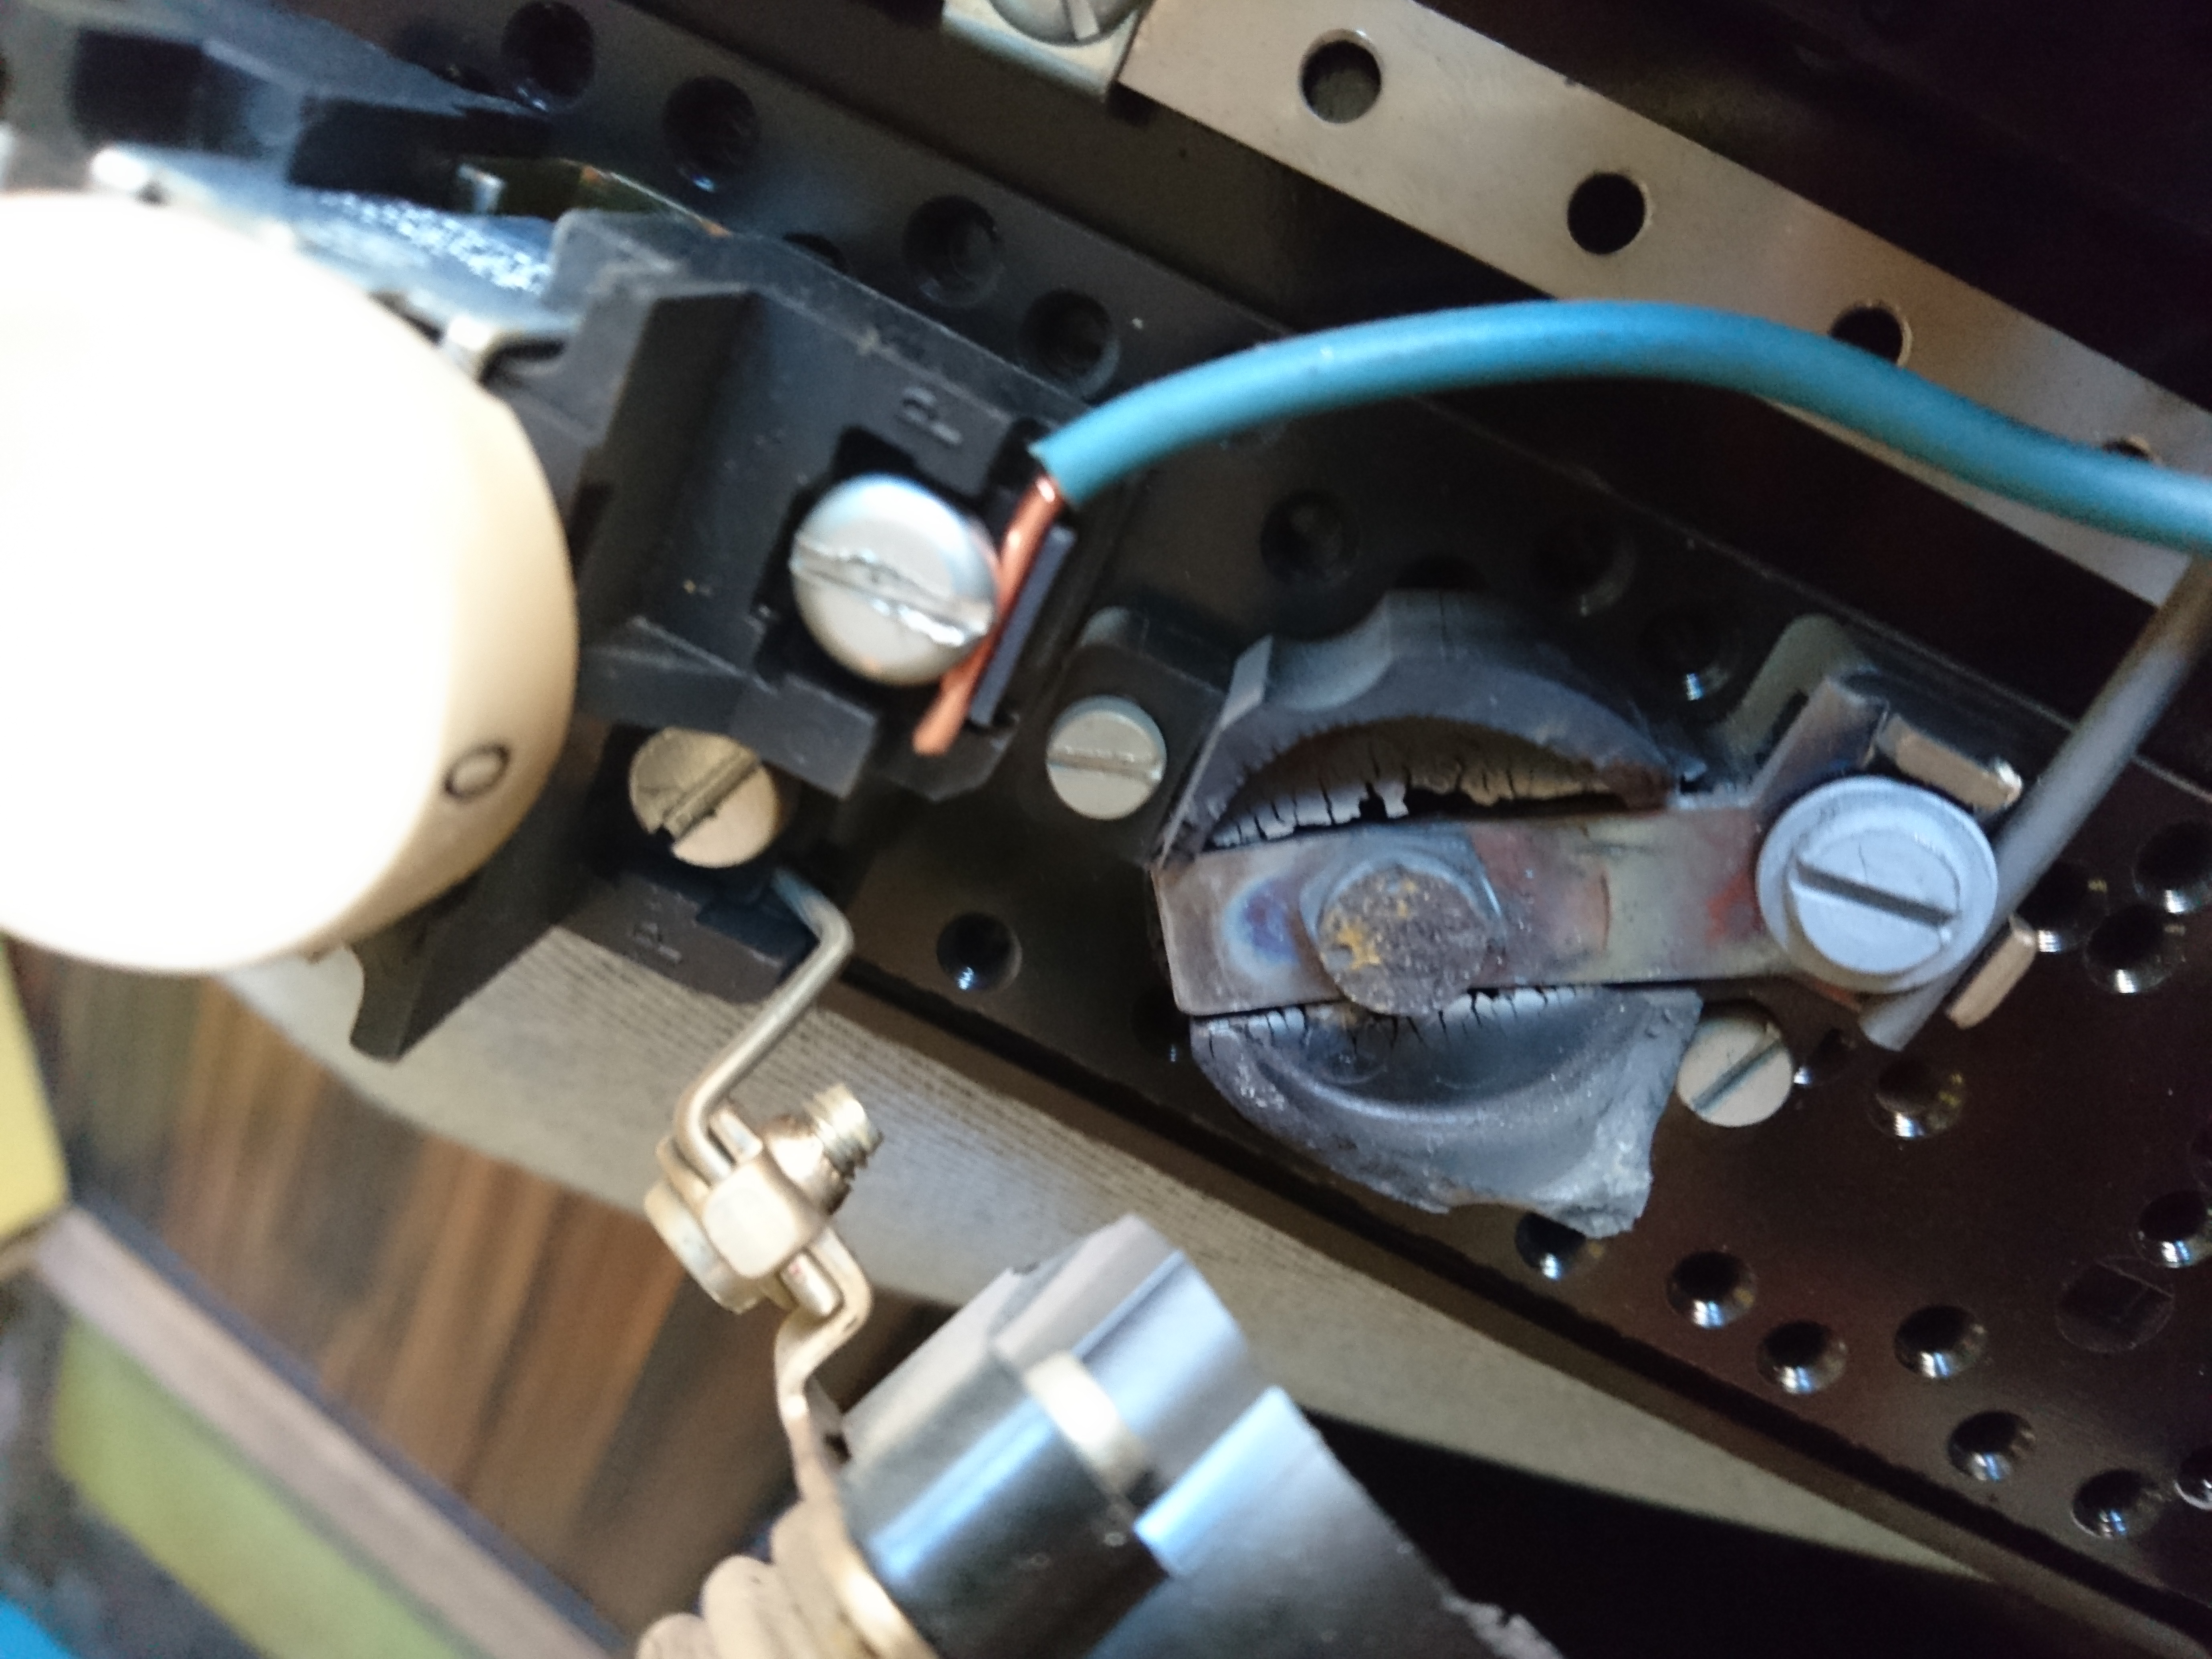
It turns out one of the fuse holders had broken, probably due to heat and that the fuse had been arching ever since. I don’t think you will ever get closer to an electric fire, without actually having a fire.
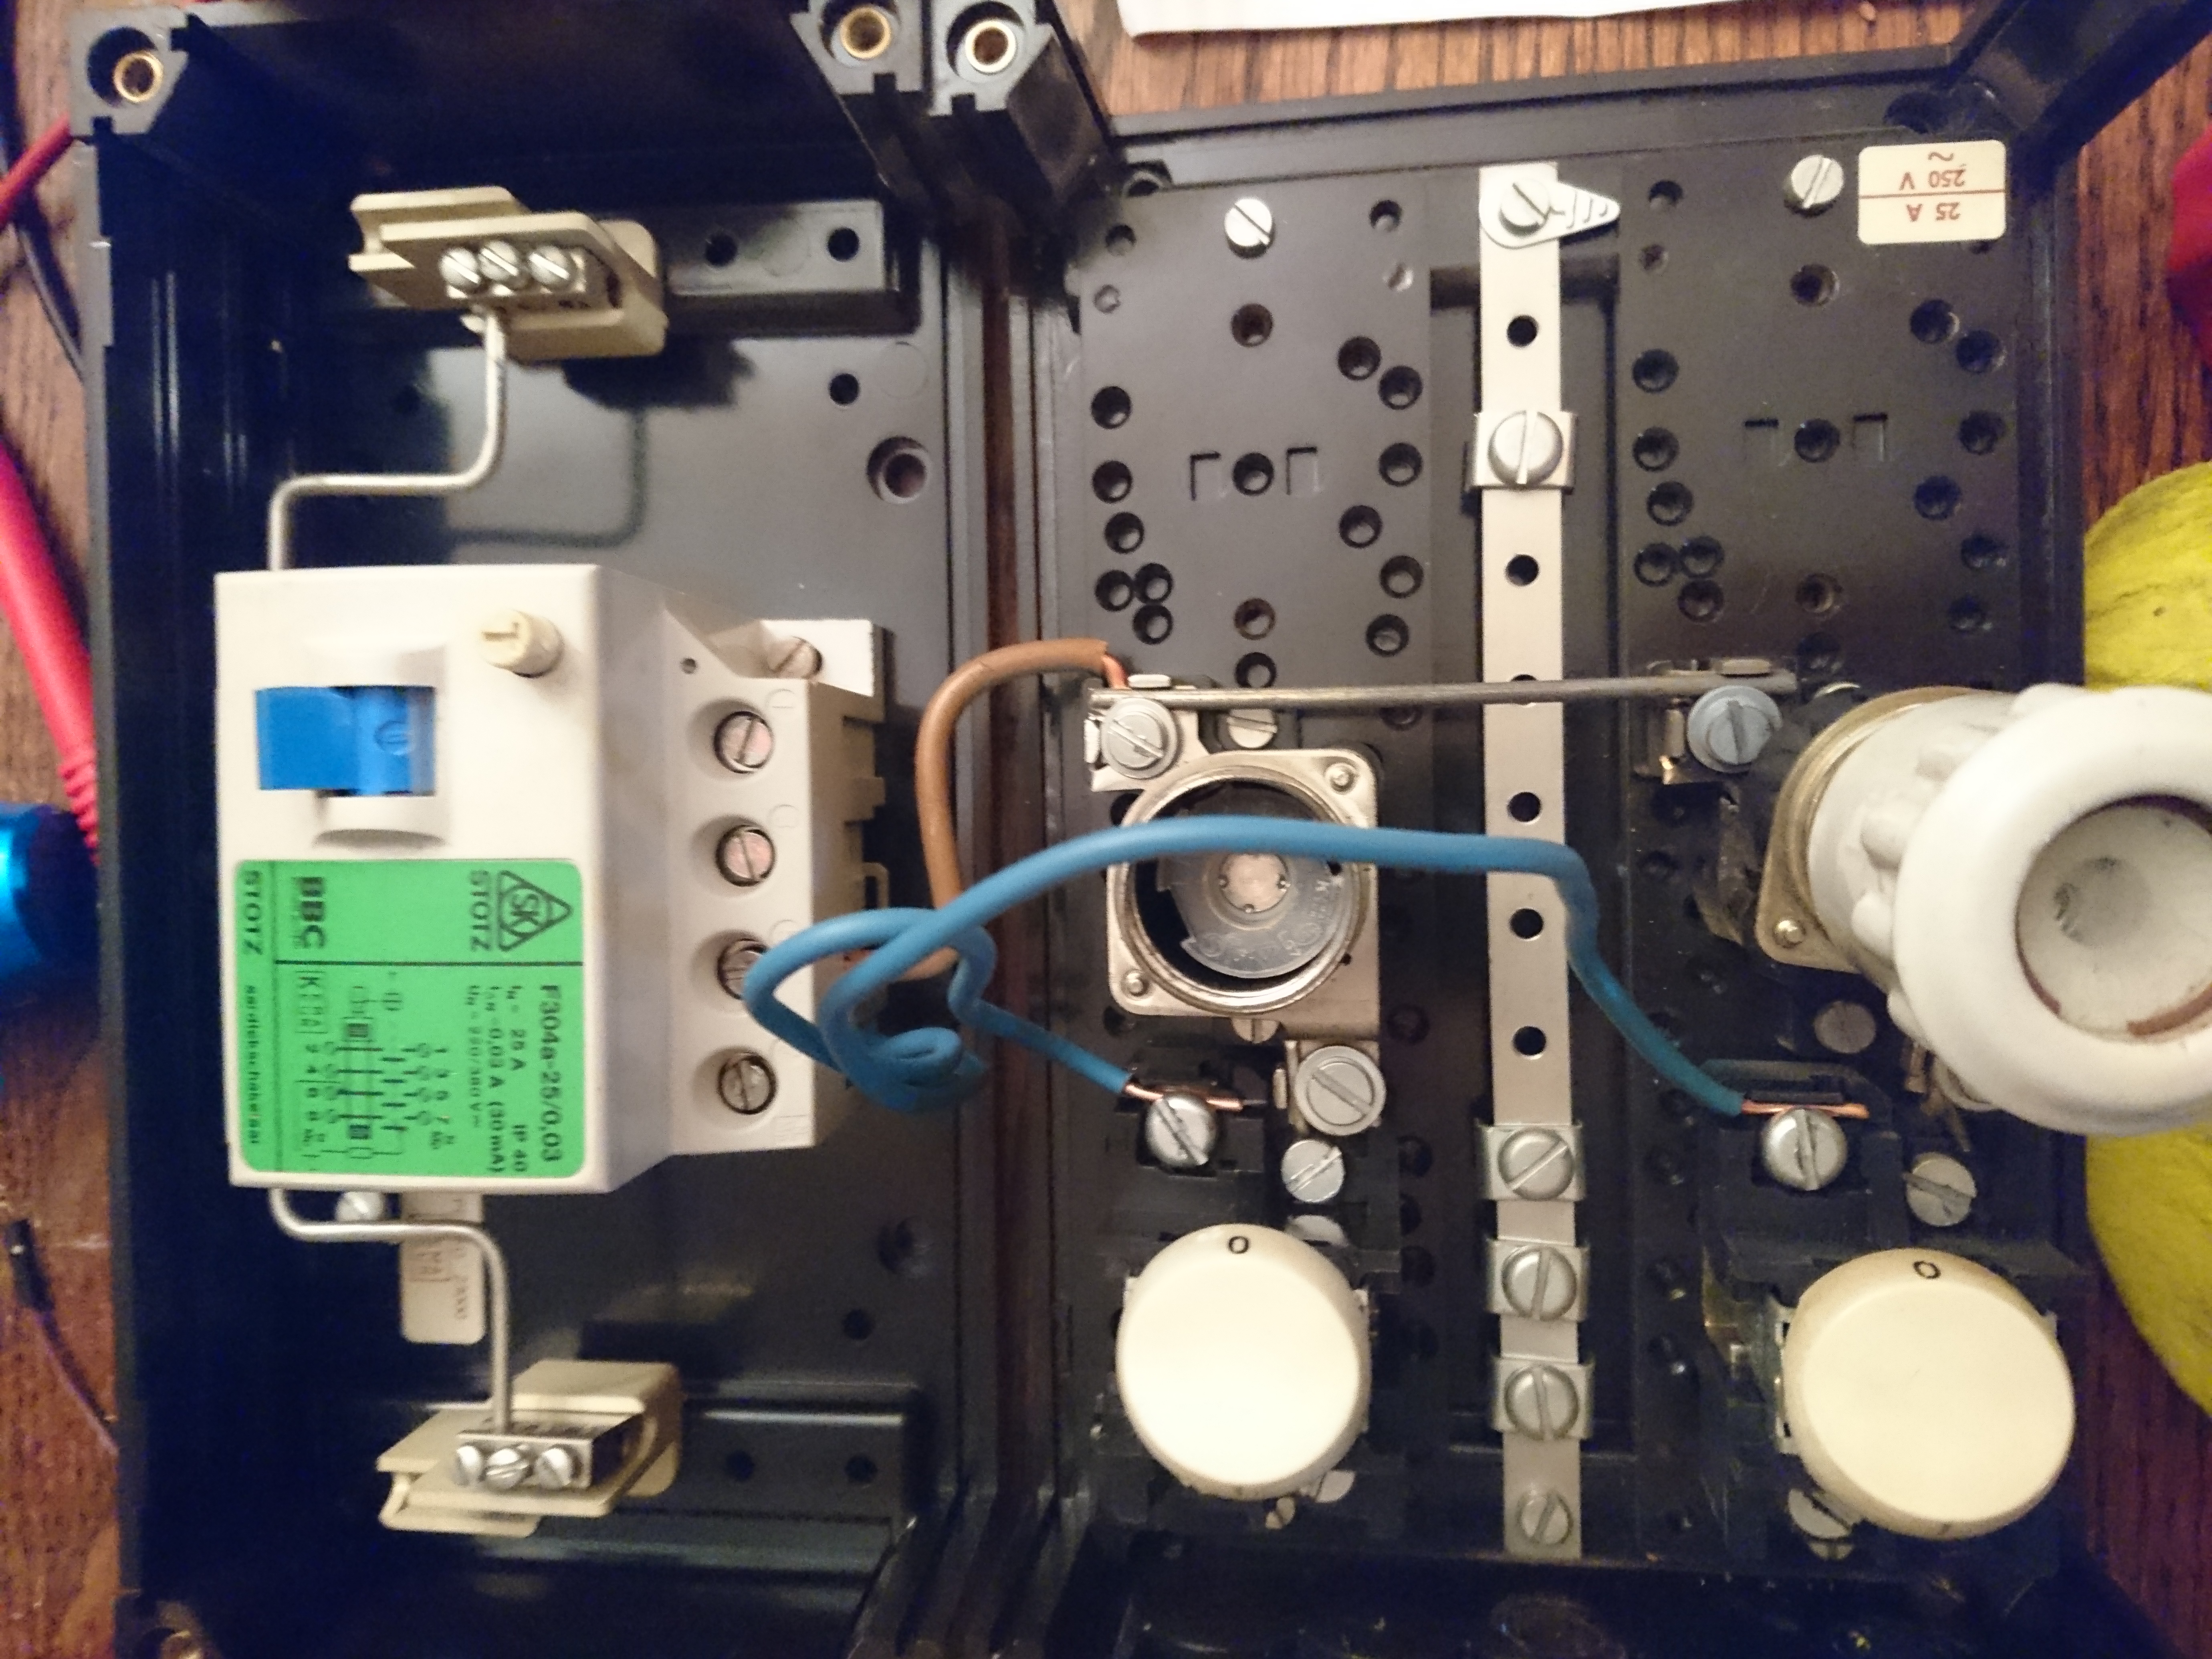
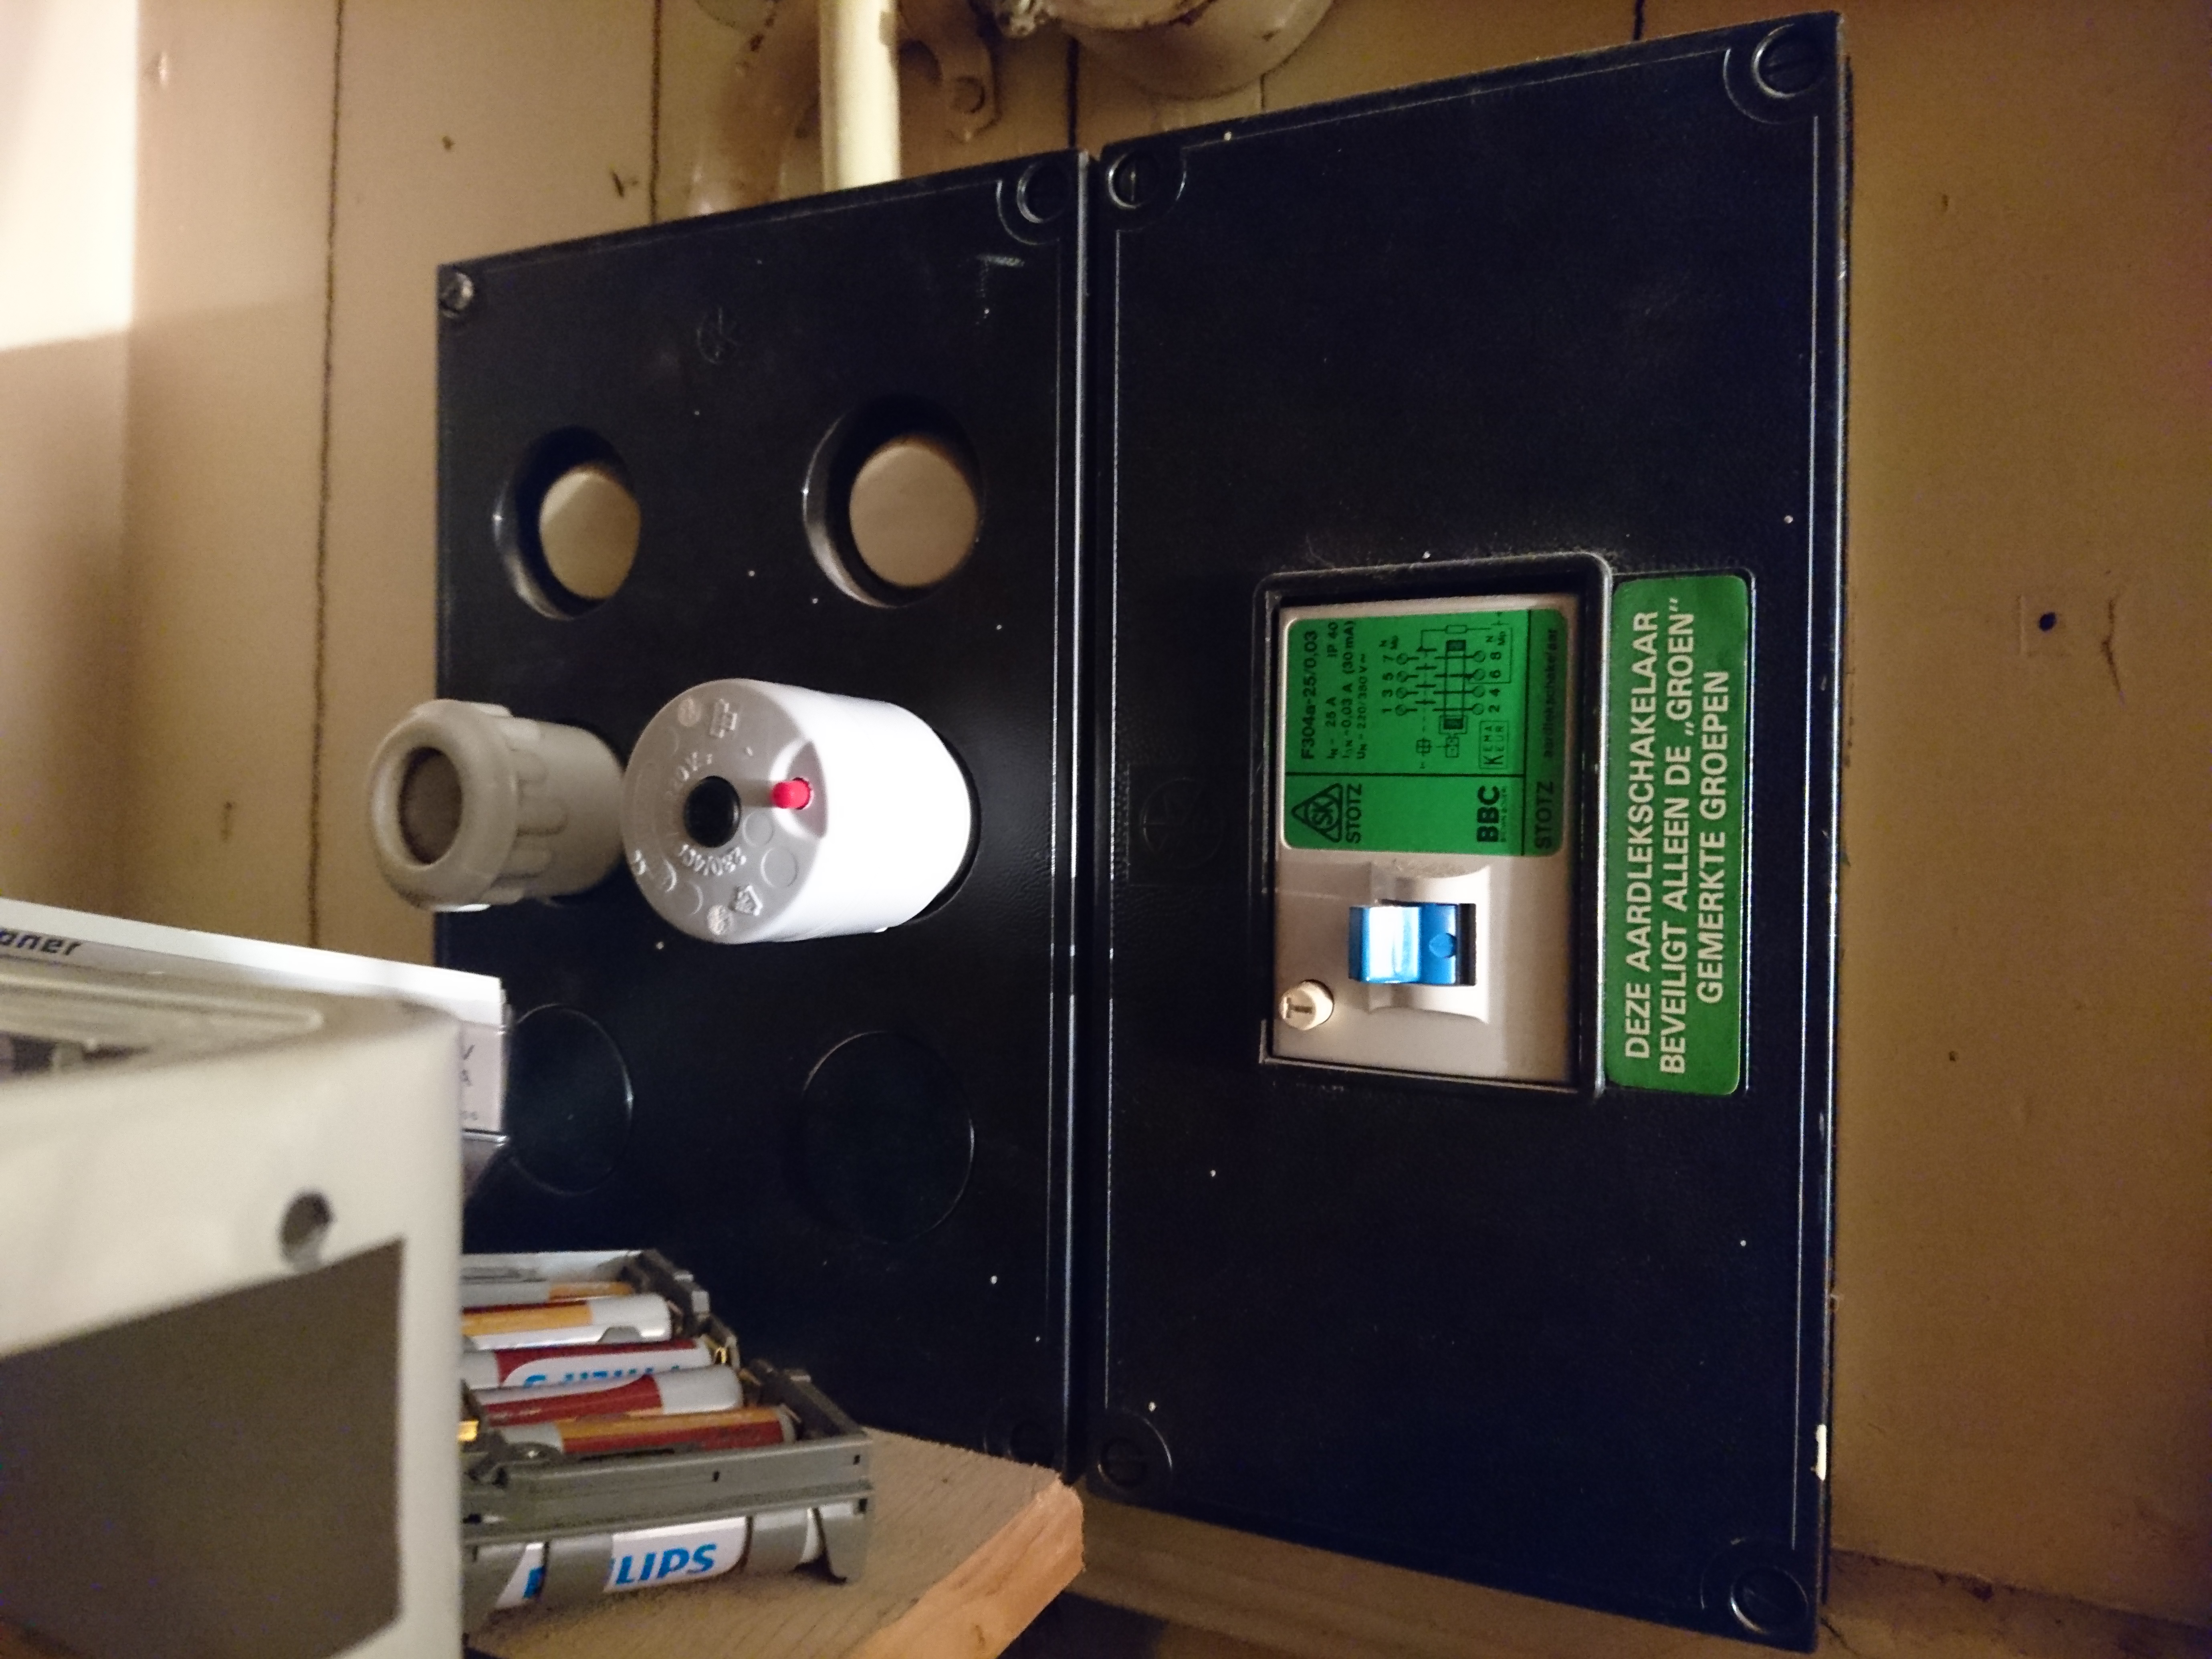
At a closer look i noticed something even worse. My apartment only has one phase coming in, but my fusebox used a 3 phase ground-breaker, which means that in order for it to break the power, all phases would have to be short-circuited which could never happen with a single phase. This means the ground-breaker might as well have been a nail or piece of cable, as it would never brake if something went wrong.
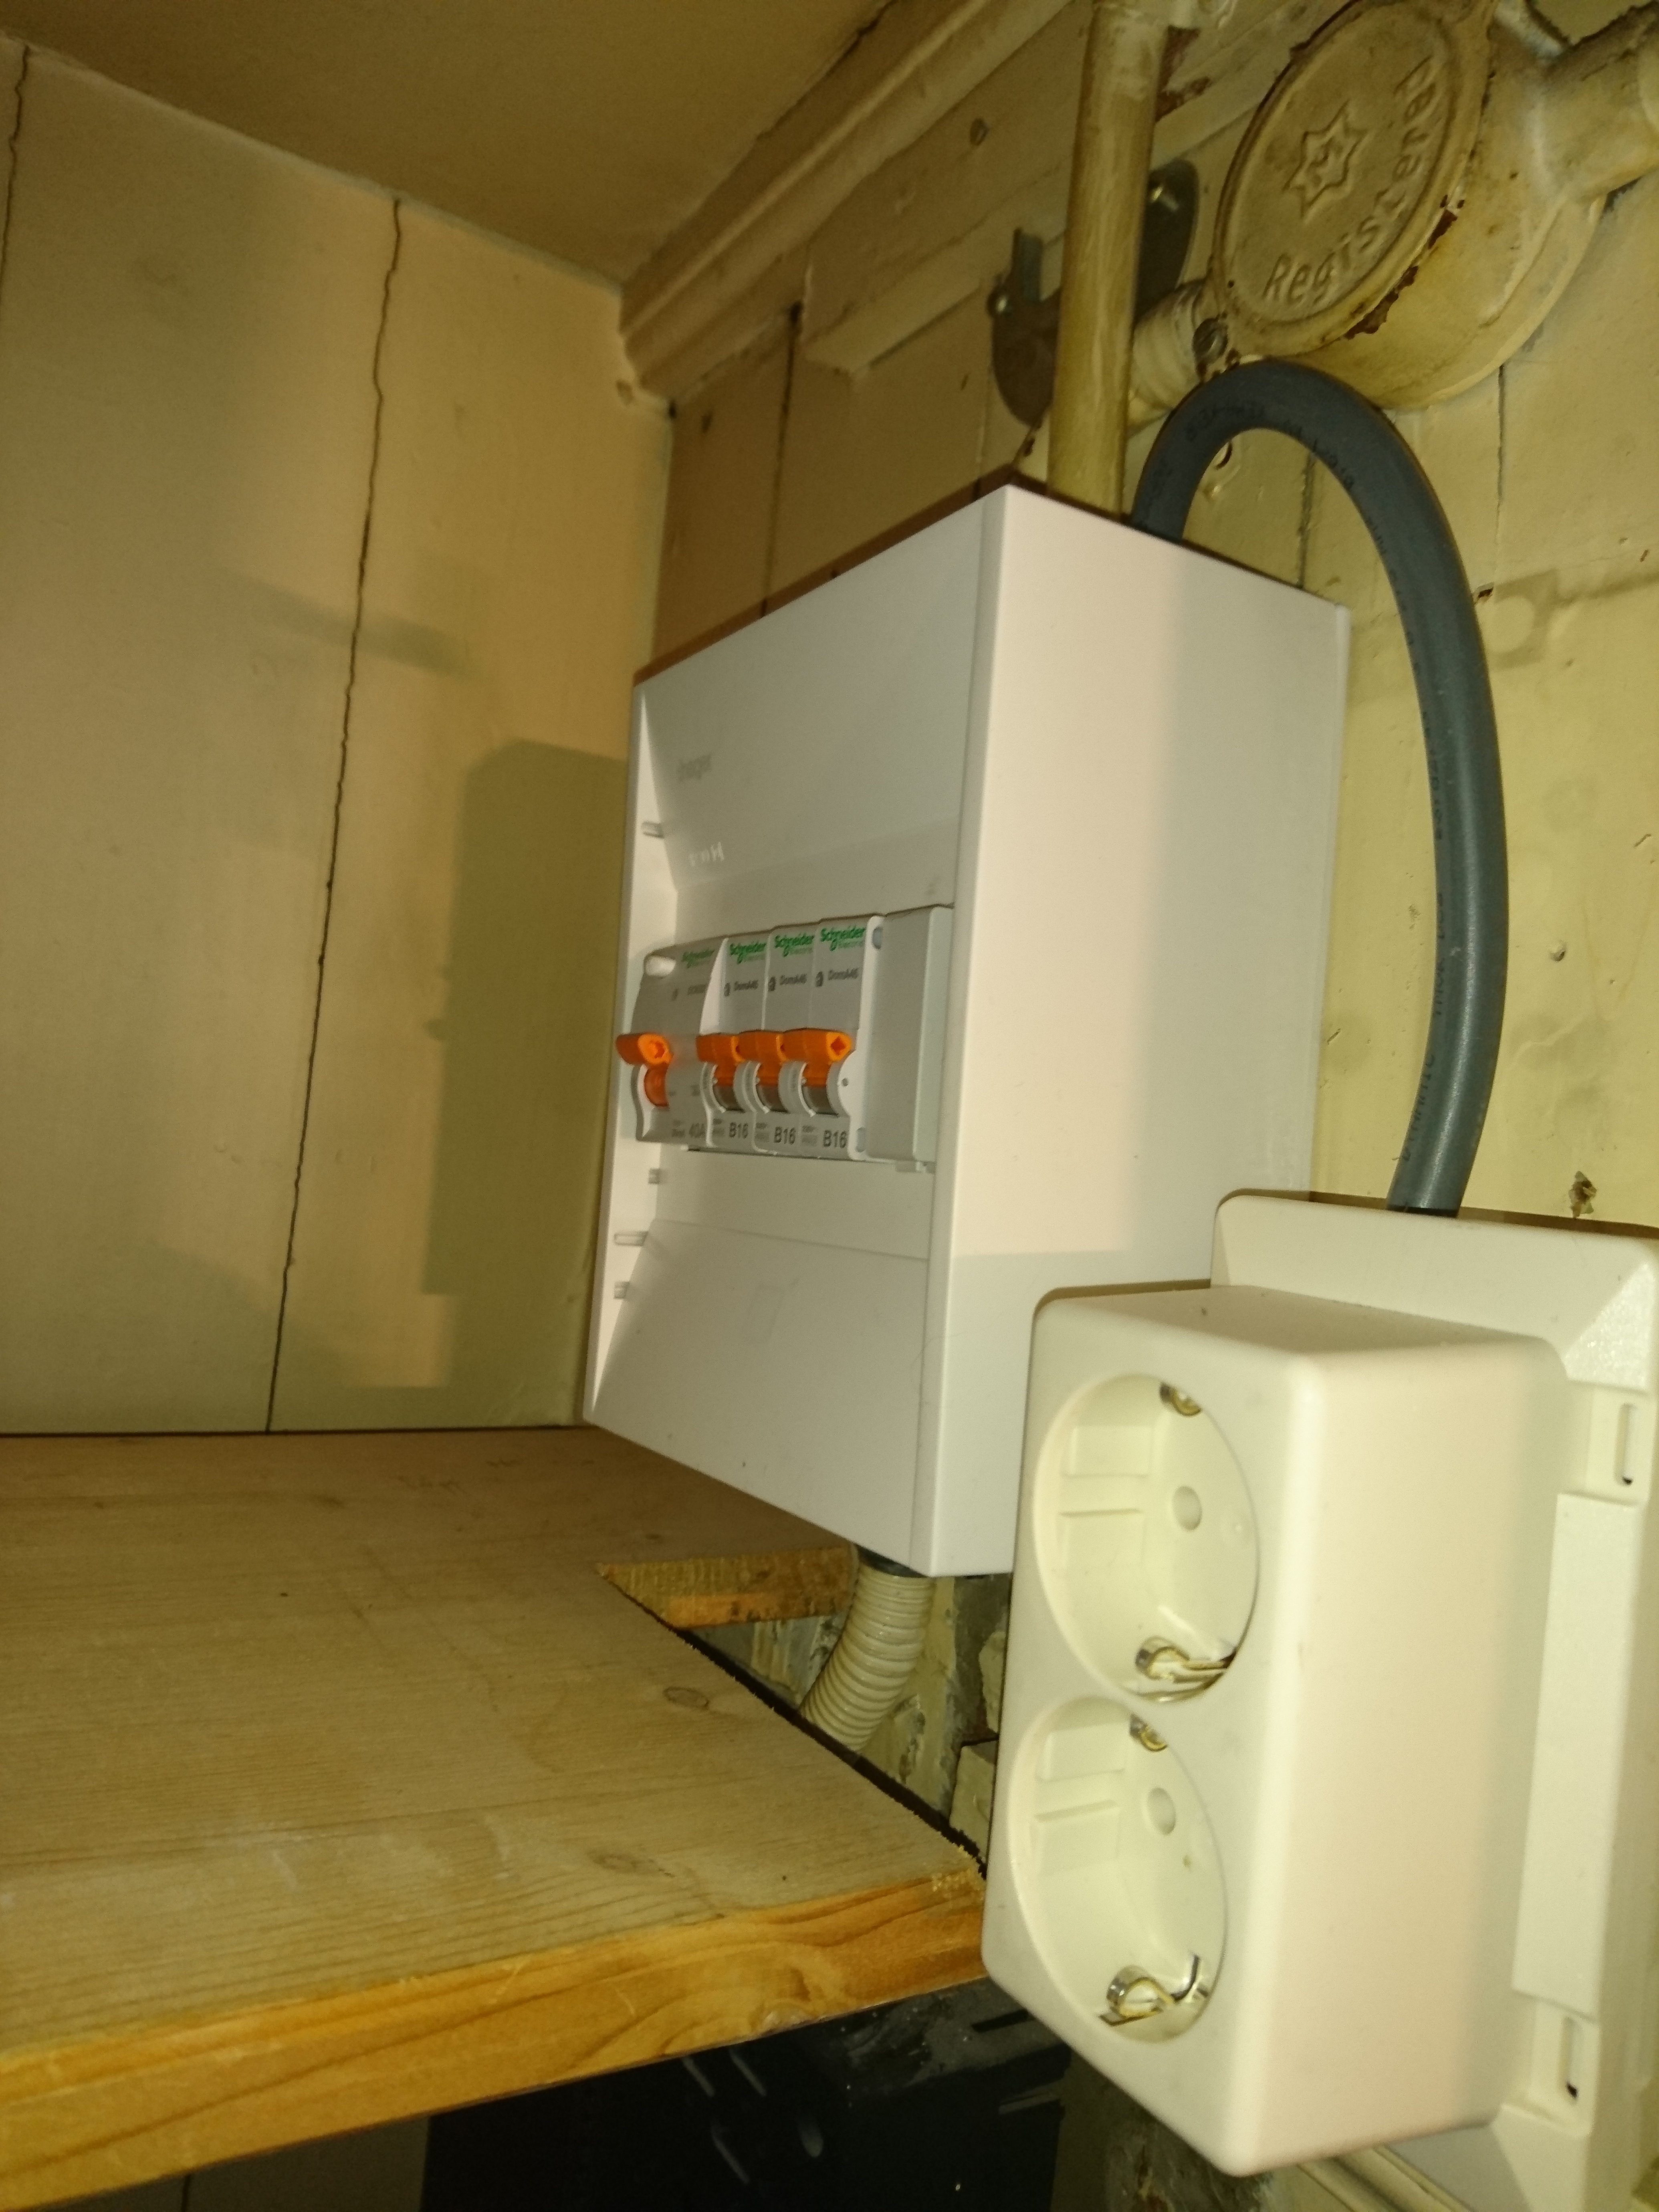
Even prior to knowing this, i didn’t trust the wiring in the walls to be up to standard, and after seeing it, it made sense not to. I therefore added a new phase, with proper cable to it’s own power-socket next to the fusebox. I will trust only this socket for anything which uses a lot of juice.
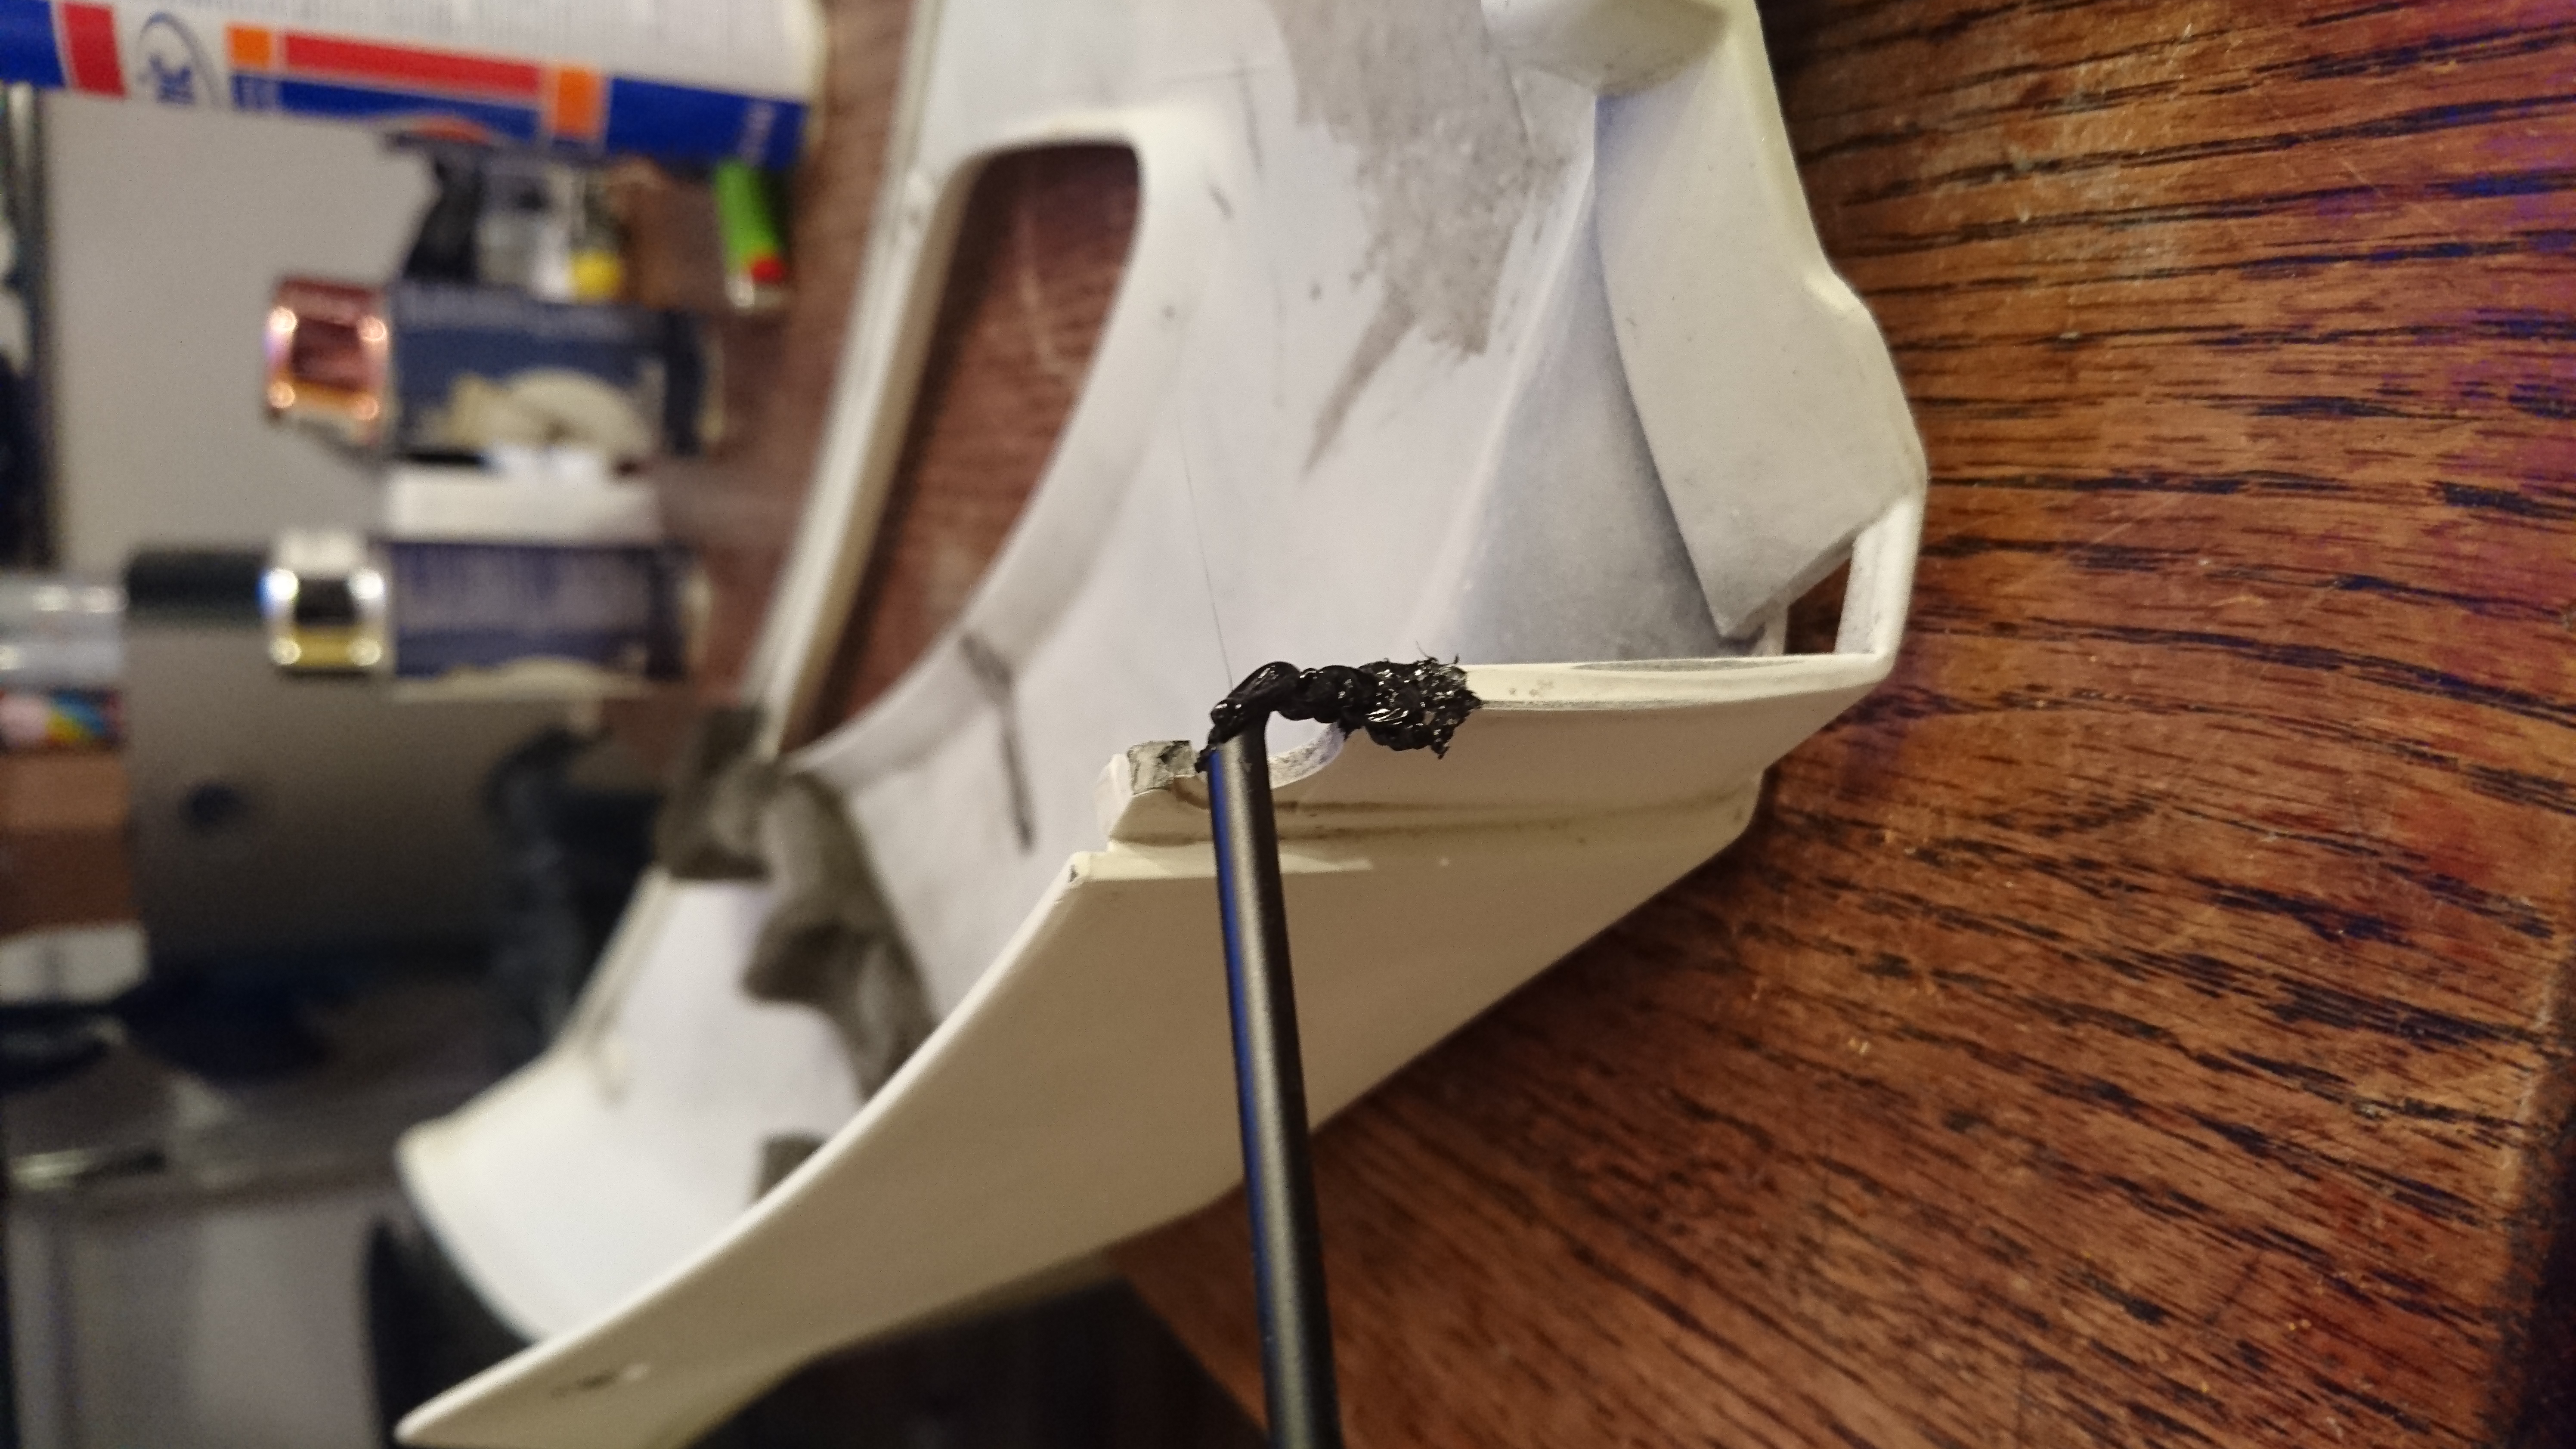
Having crashed my bike a few times my fairing have had better days. I read up and realize it could be welded using a regular solder-iron.
The plastic i use for this are ABS-rods specifically made for ABS-welding, but if you have ABS filament for 3d printing, this will work as well.
The technique used is simple. Heat the area where you want to add material with a soldering iron and insert new material slowly building it up again. You can use a gas driven soldering iron, but only if it has a tip. Exposing ABS to a torch flame will ruin it in a heart-beat.
Start by cleaning up the piece, filing down dirt to expose clean material.
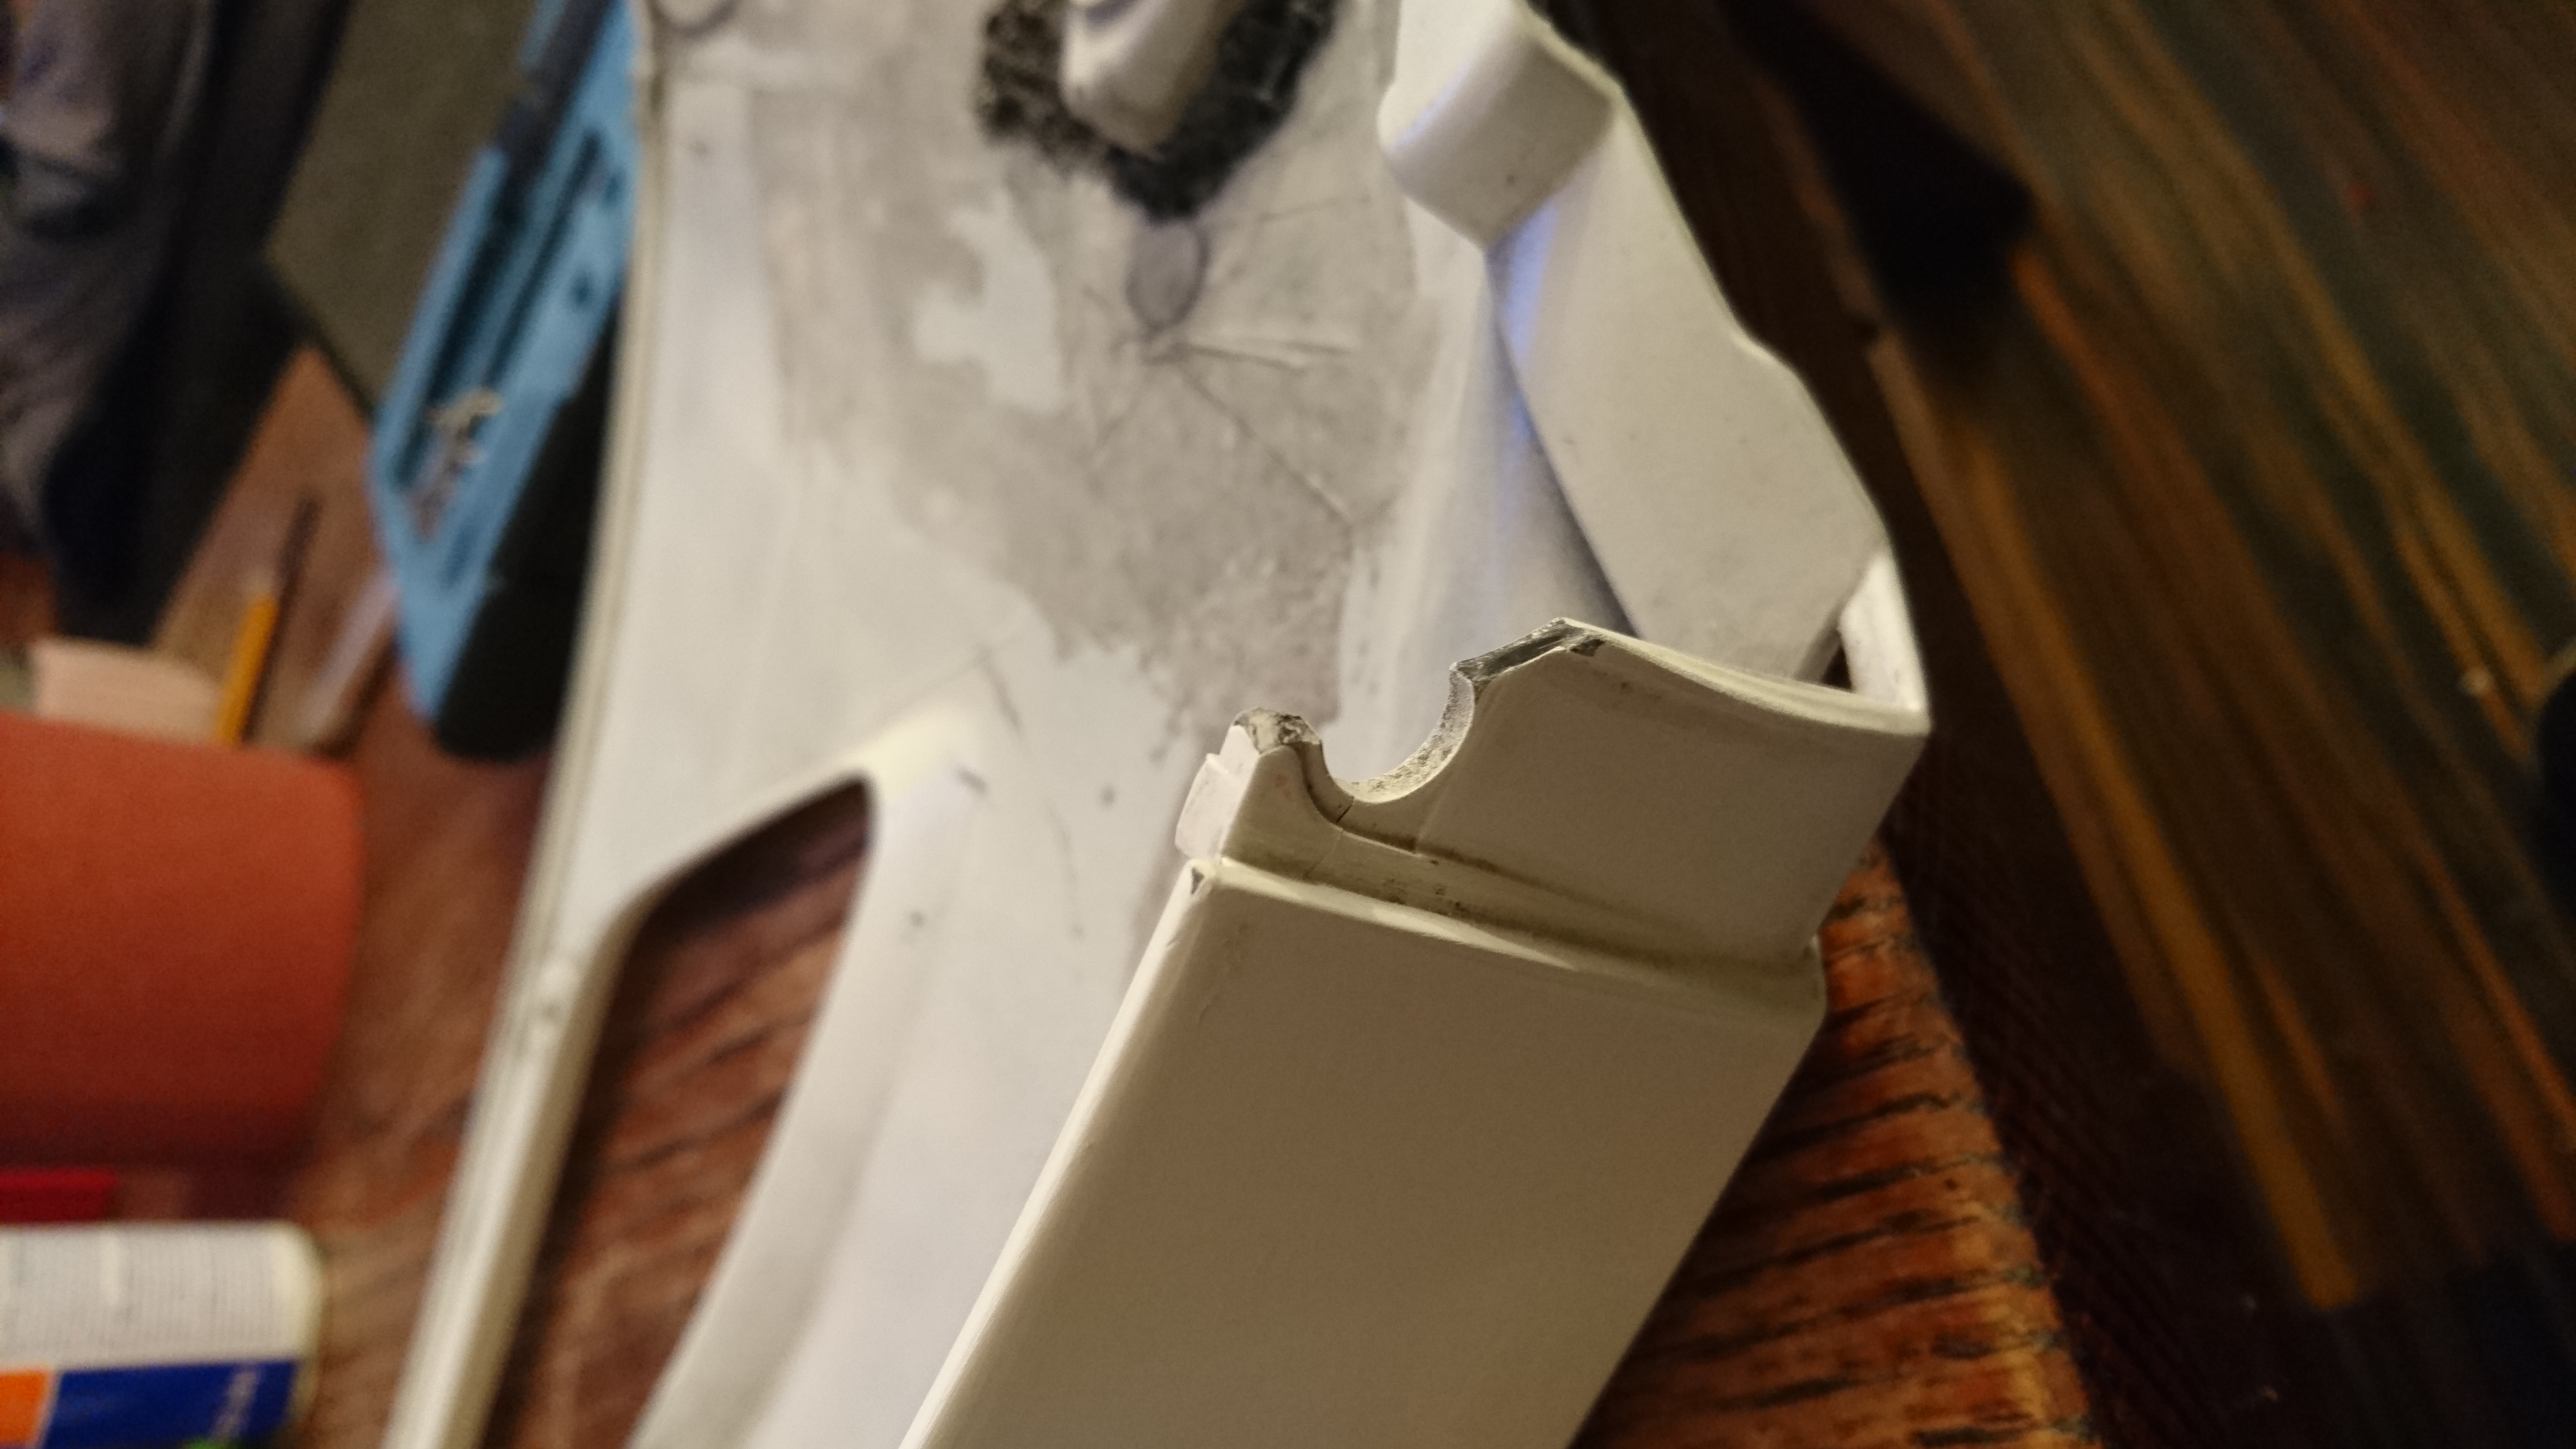
Cracked piece
Start by making a string in the direction you intend to build the plastic.
Starting to build up ABS
Continue injecting material, adding a good 2mm in thickness all around it. This will insure that the core of your new part becomes solid and that the piece is not full of tiny holes and gaps once filed down.
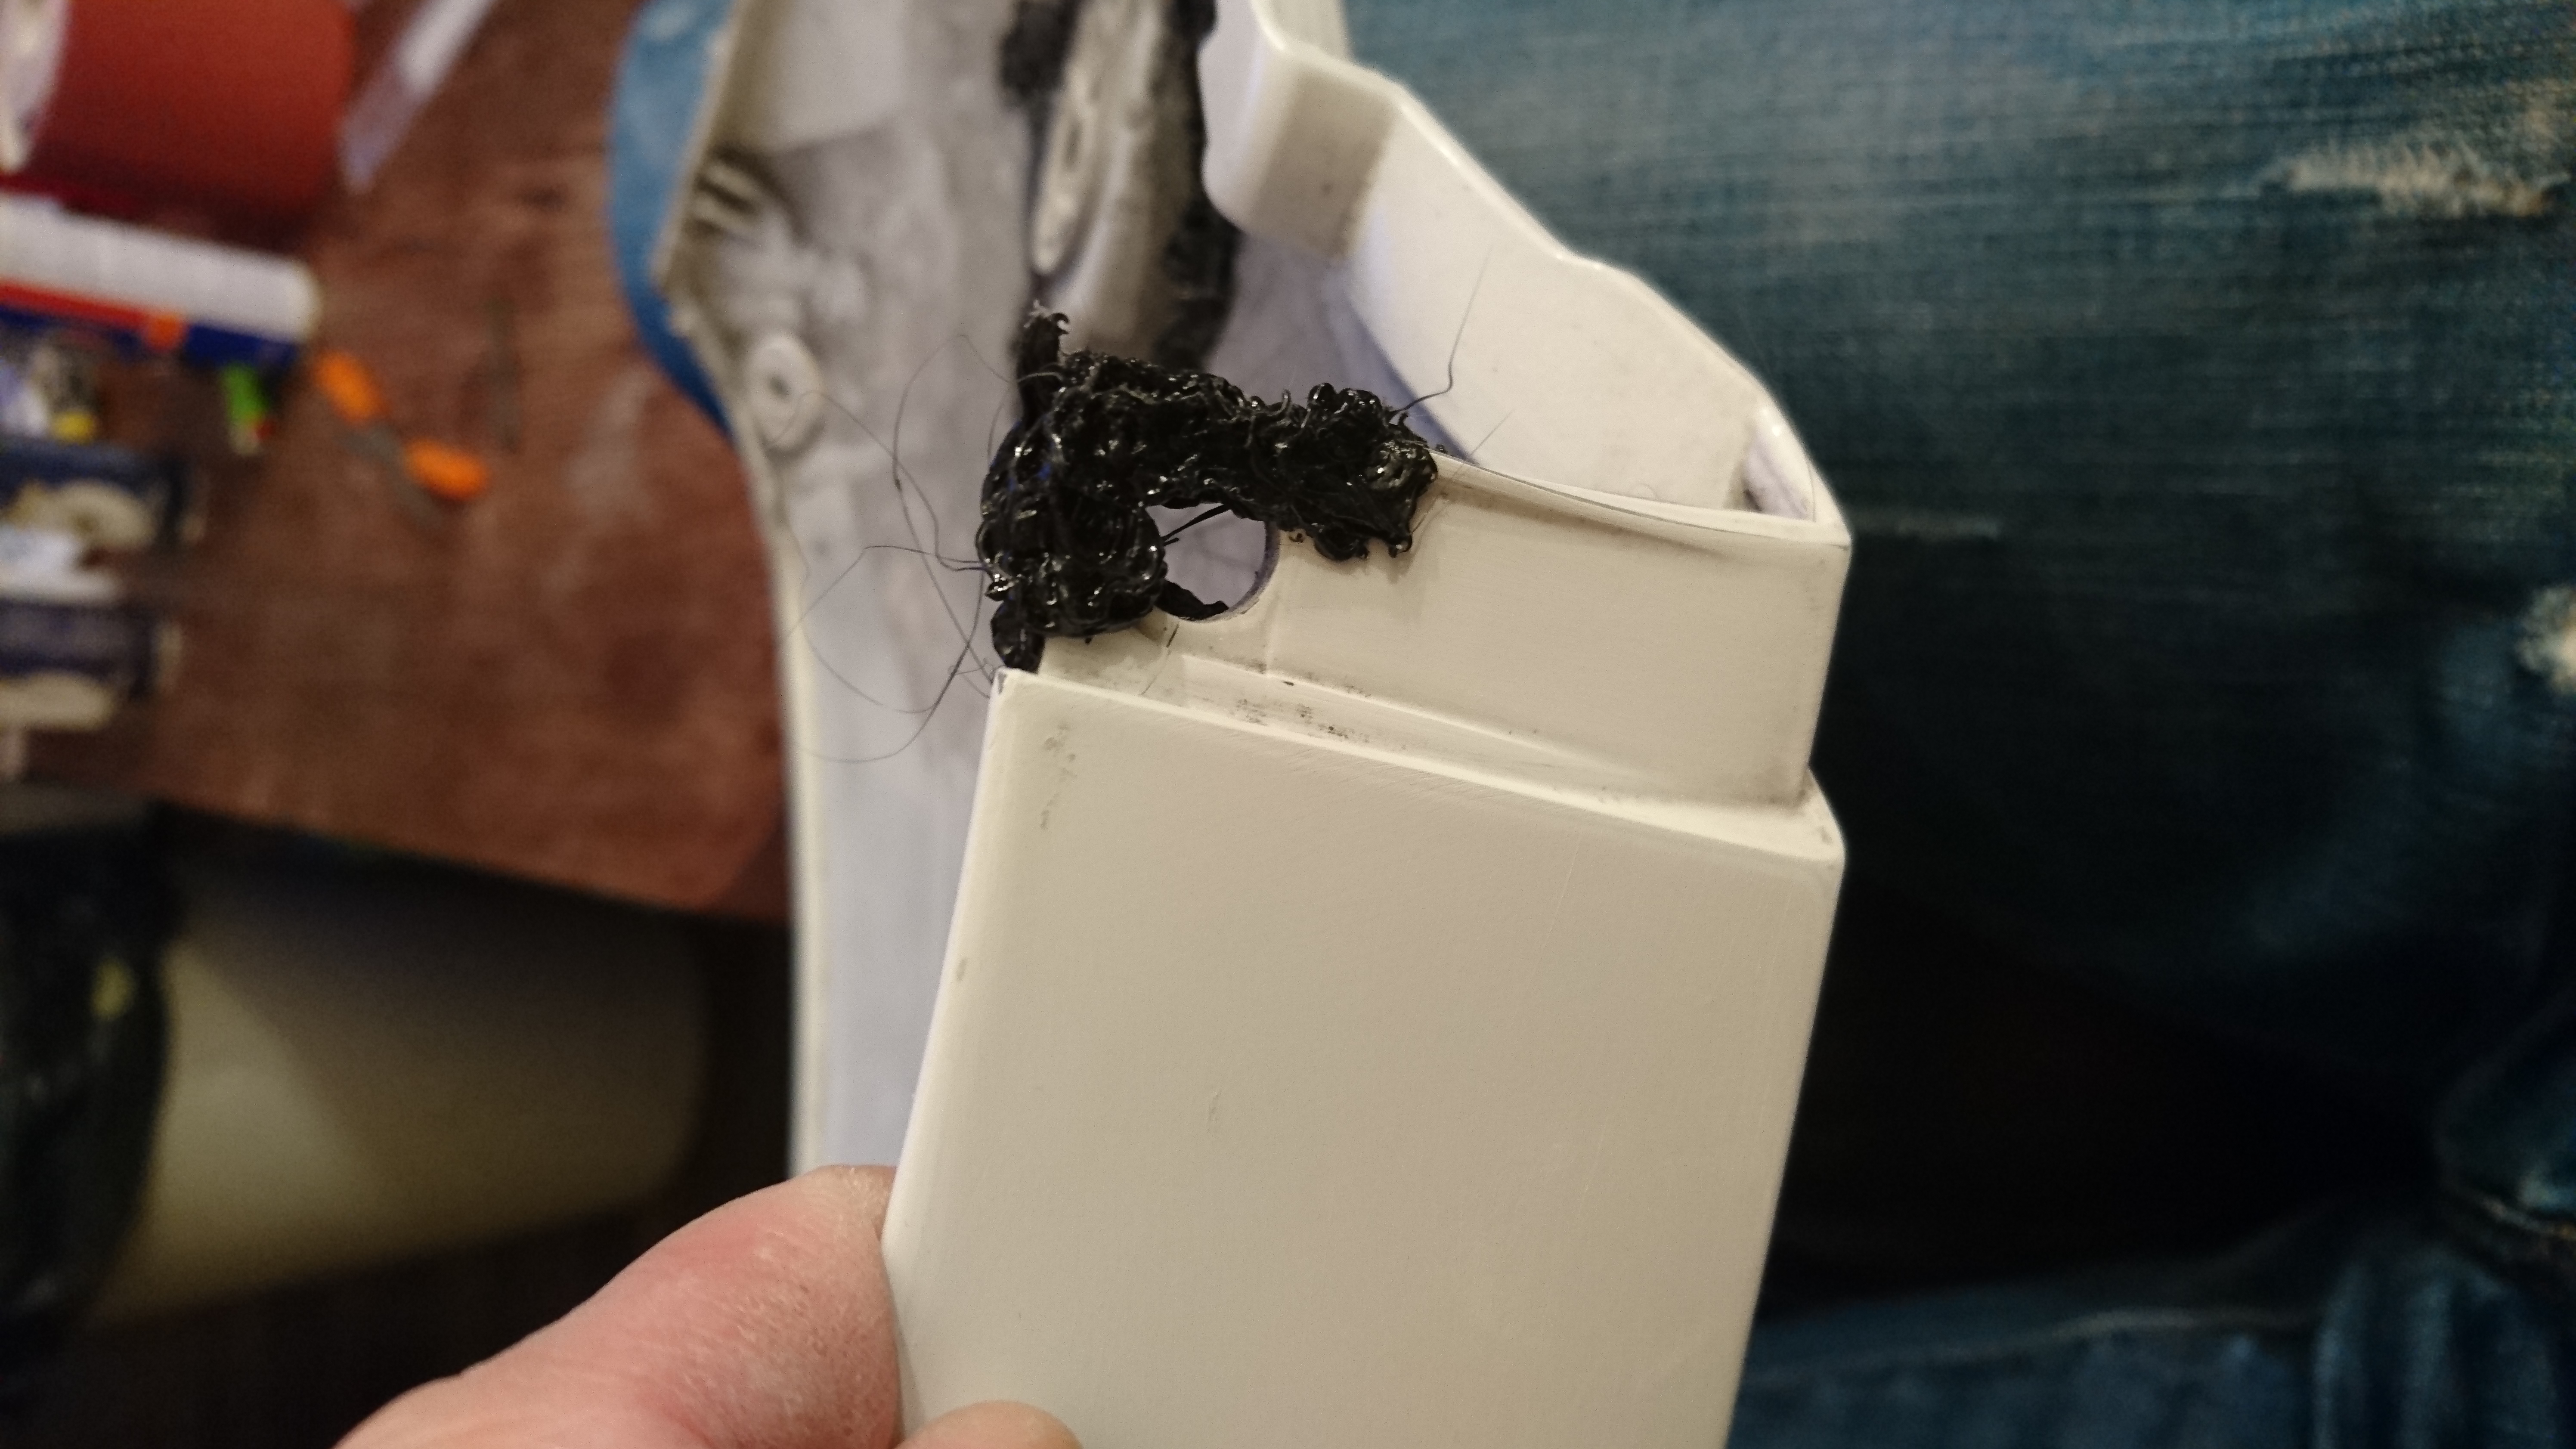
It’s important to inject a lot of material and avoid gaps with air.
Keep re-melting the plastic and insert more plastic to make sure it’s solid.
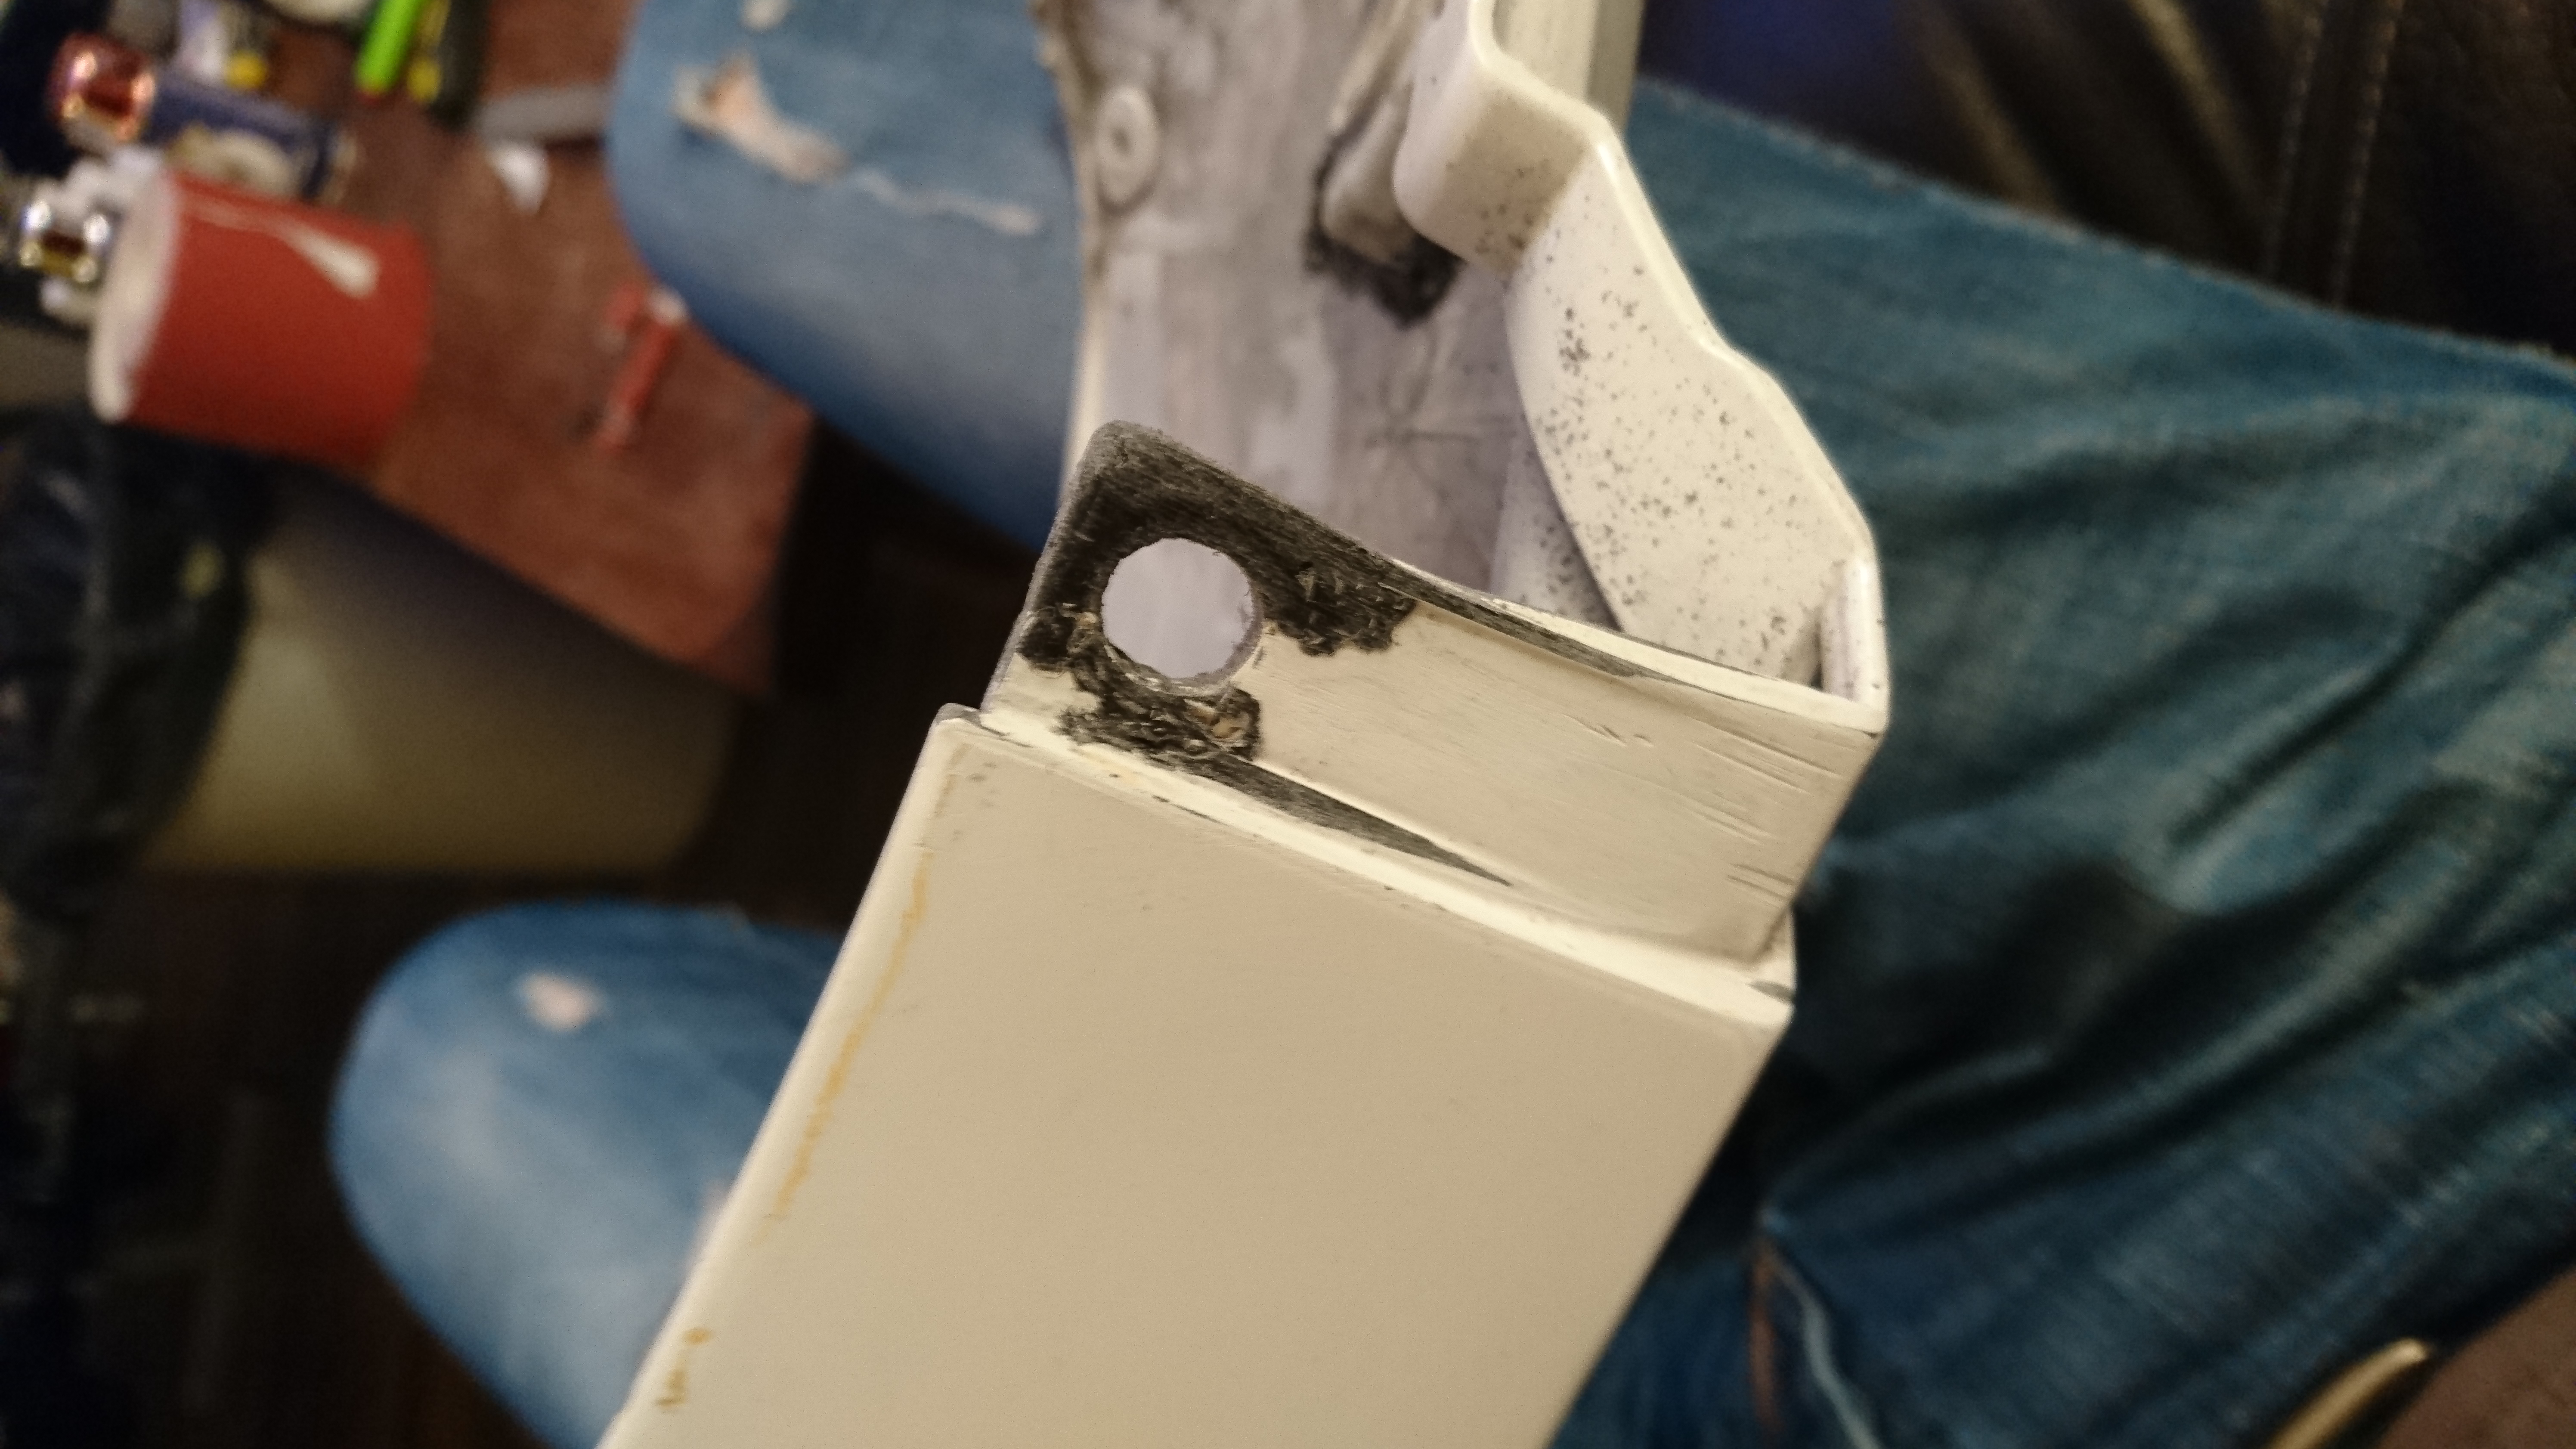
Redrilled and filed into shape.
After filing the piece down you might see small gaps. There is no harm in reheating and add more material if you see gaps.
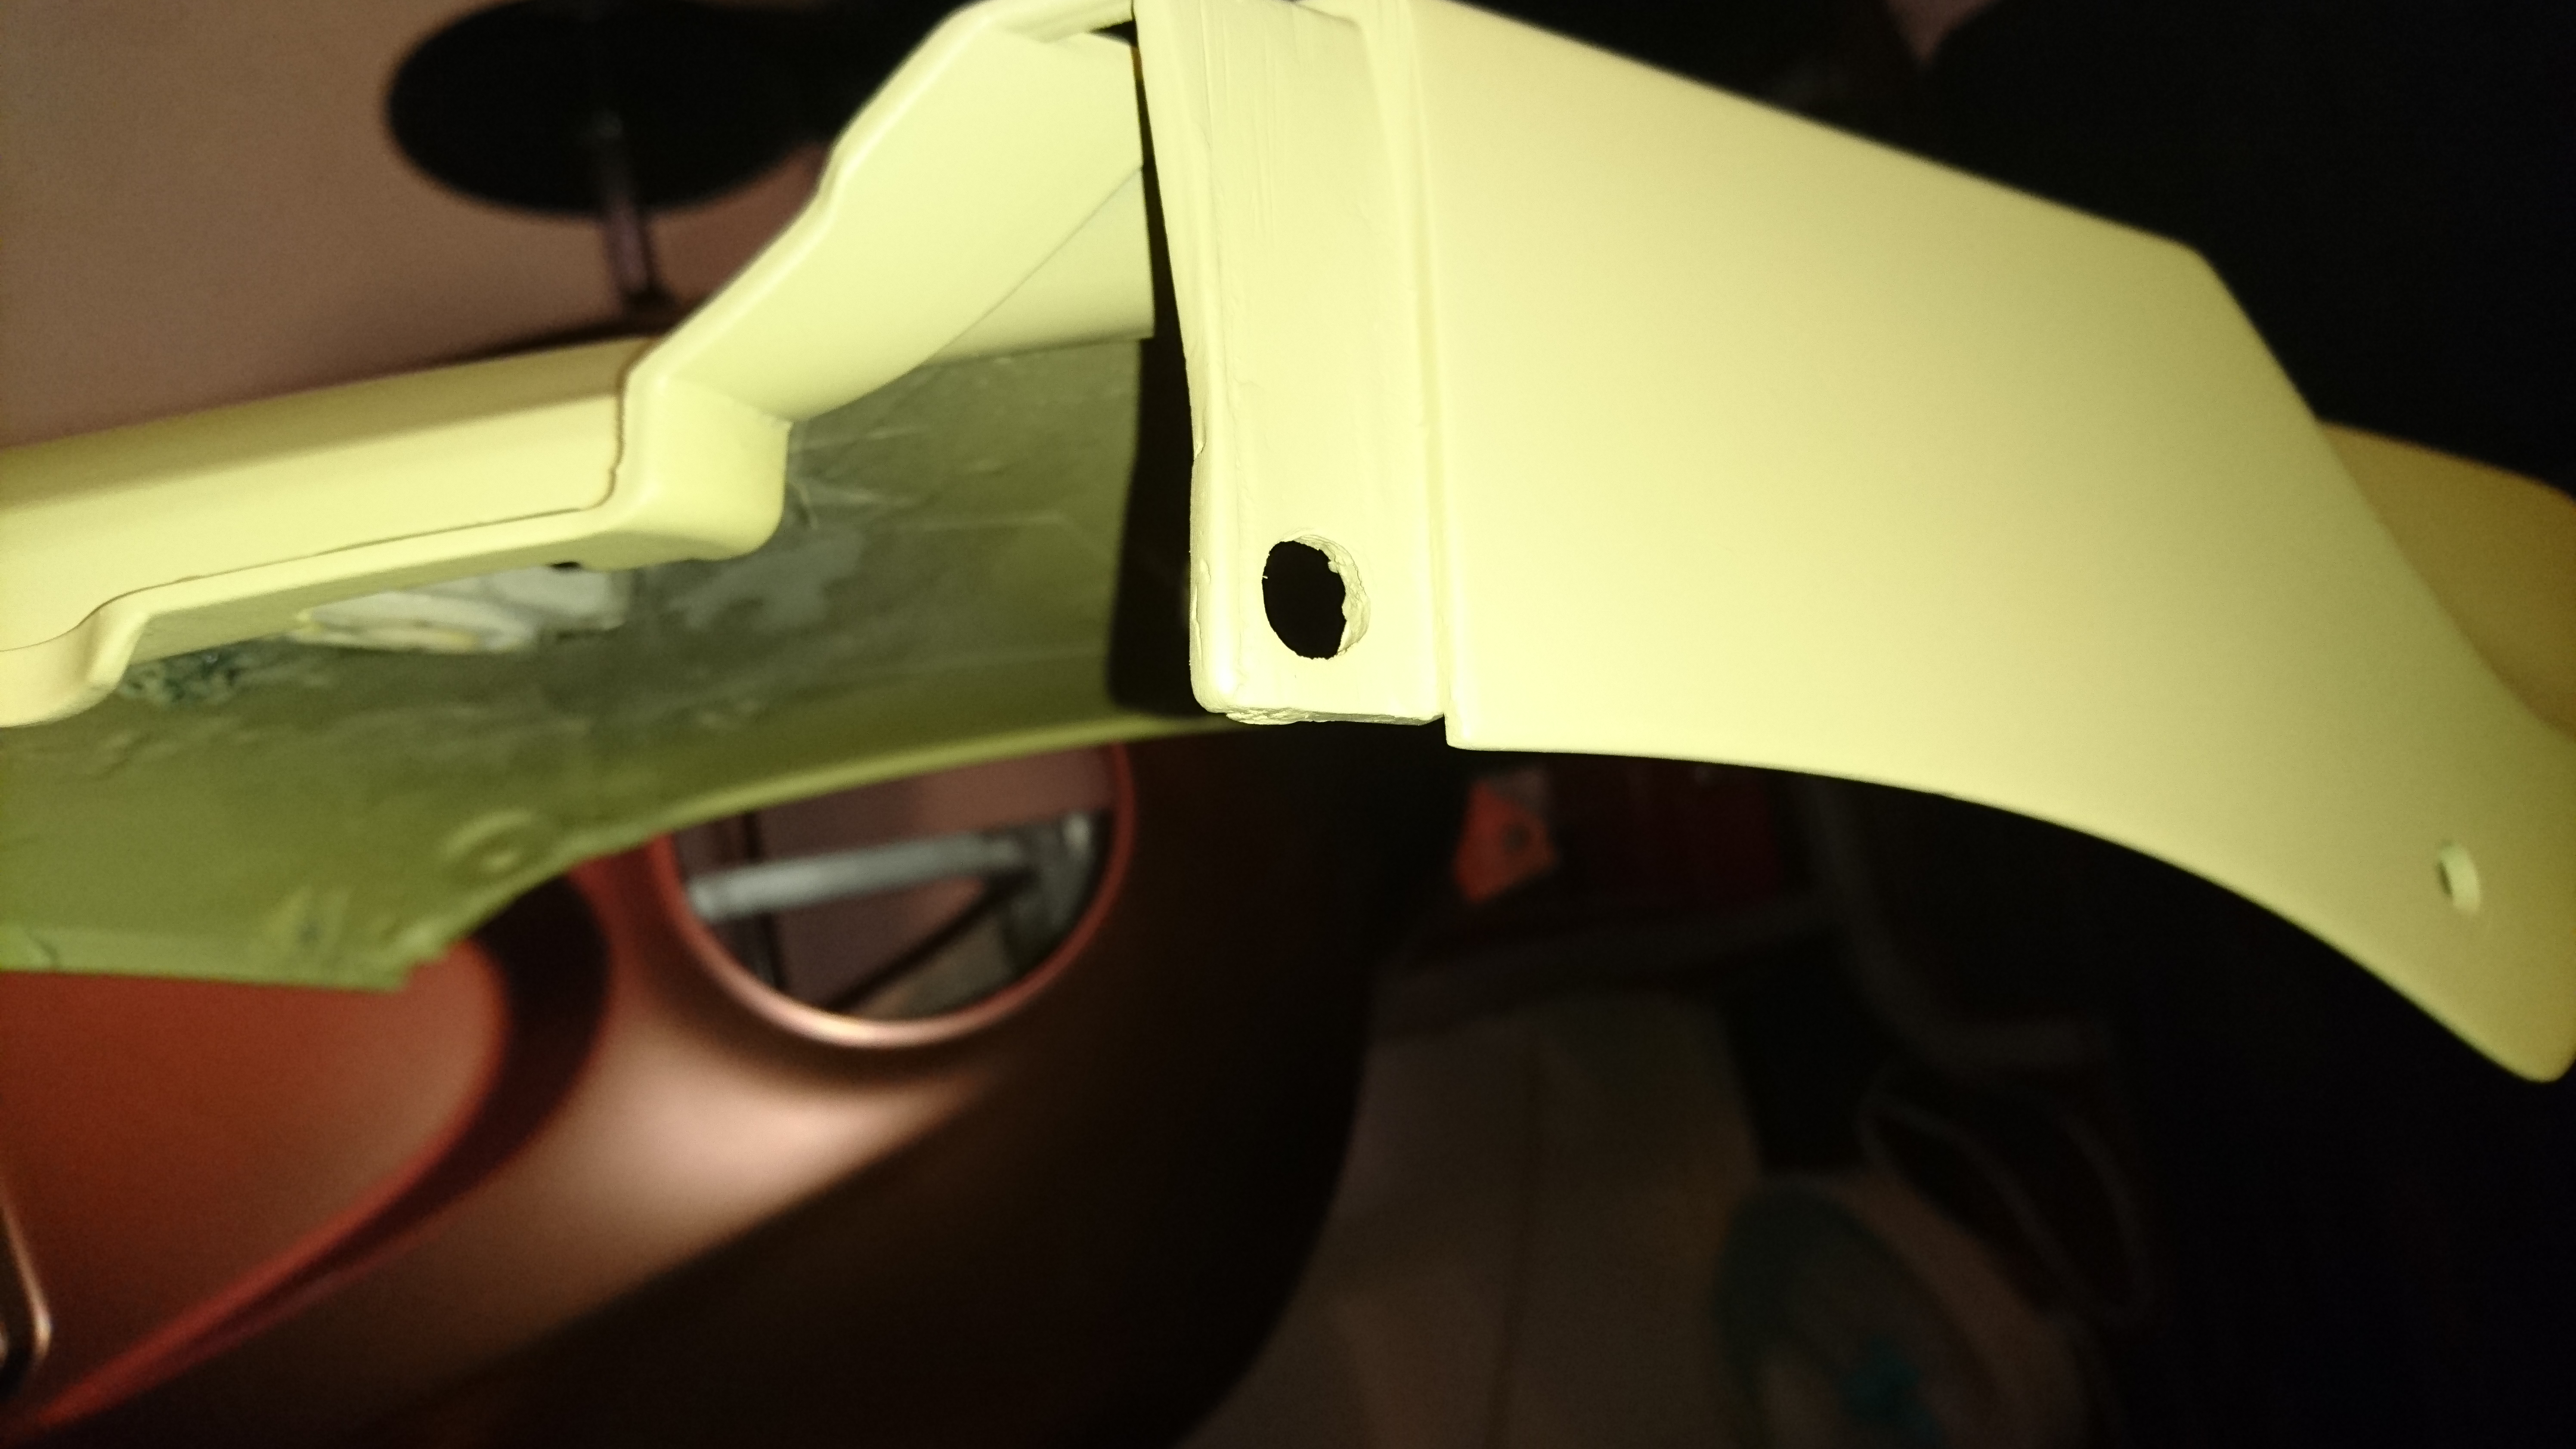
A couple of coats of primer later
Only thing missing now is a few layers of paint and clearcoat and it will be as strong as new.
Your bike is now ready to be crashed again ;)